Last Updated on May 30, 2024 by Carne Diem
Protein: 
Origin: American, Nose to Tail Cooking
Method: Smoker or Grill
Jump to RecipeThis smoked spatchcock chicken recipe is seasoned with a savory barbecue rub and then cooked hot and fast on your smoker giving you great results every time. The hot and fast method for cooking results in that perfectly crispy skin and juicy and flavorful meat, while still giving your that great smoky flavor that you crave.

Table of contents
Why is Spatchcock Chicken the best way to smoke chicken?
When it comes to ways to cook chicken on the grill or smoker, few methods can beat a spatchcock chicken. Not only does this method help the chicken cook more quickly it also helps it cook more evenly, avoiding the health risks of the trendy but inefficient beer-butt chicken. Spatchcocking a chicken or turkey is really fairly simple, and even better you can enjoy that beer while you cook instead of placing it up the chicken's backside.
The problem with cooking a whole chicken is that the different sections of the bird finish at different times, thus your breast is dried out by the time your thighs are done, and by then your wings are crispy and unappetizing. A beer can chicken only amplifies this issue, with the cold beer acting as a heat sink where the inside of the chicken stays cold even well after the outside of the bird is overdone. Not to mention the possible ink transfer from the can to the meat, and the fact that the beer is not really doing anything at all. Unless you plan on cooking your chicken to an internal temp of over 212 degrees, that beer is not creating steam and is not providing any flavor to the chicken sitting in the cold chicken cavity.

Now that I am off my soapbox, let's get back to how to smoke a juicy, evenly cooked, spatchcock chicken. The same methods for trimming the chicken can be applied to turkey, duck, or any other poultry.
How to Spatchcock a Whole Chicken

All you need to spatchcock a chicken is a sturdy pair of sharp kitchen shears or poultry shears. The goal is to remove the backbone of the chicken, so it lays flat. Be sure to remove the giblet bag if your chicken came with one, before beginning. There is no need to rinse the chicken before beginning, it just spreads bacteria all over the place, but if it makes you feel better go ahead. Either way, use paper towels to pat the chicken skin dry.
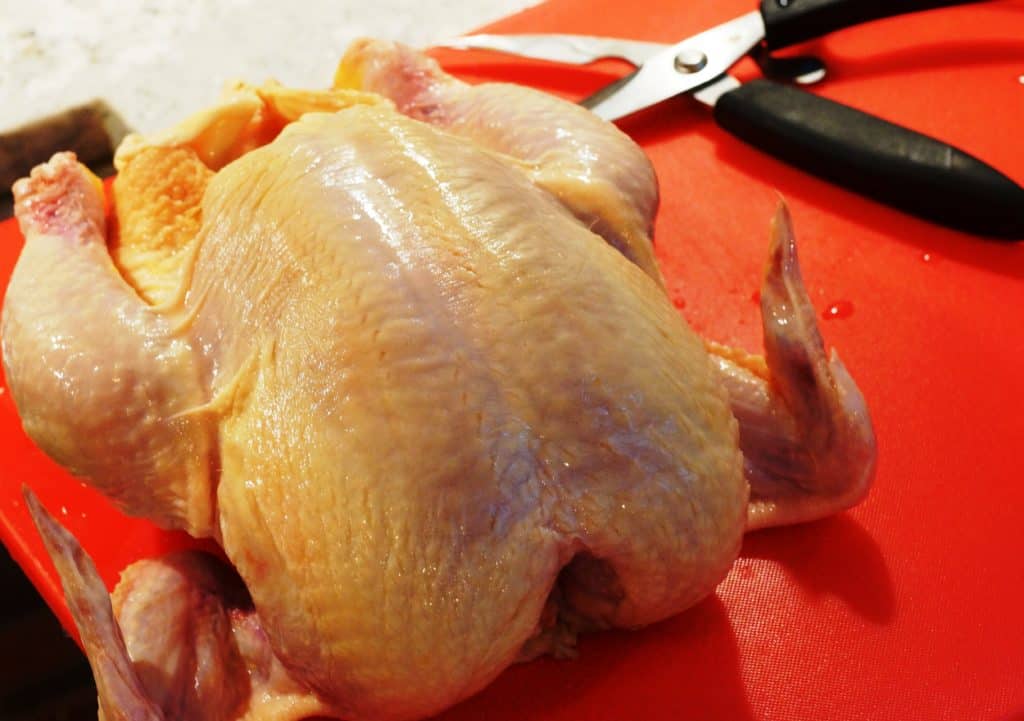
Place the whole bird on a cutting board or baking sheet. The first step in spatchcocking the chicken is to locate the spine of the chicken and use a pair of kitchen shears to cut along the right side of the backbone from the "neck area" to the tail.

Next, repeat the same process along the left side of the spine to remove the backbone.
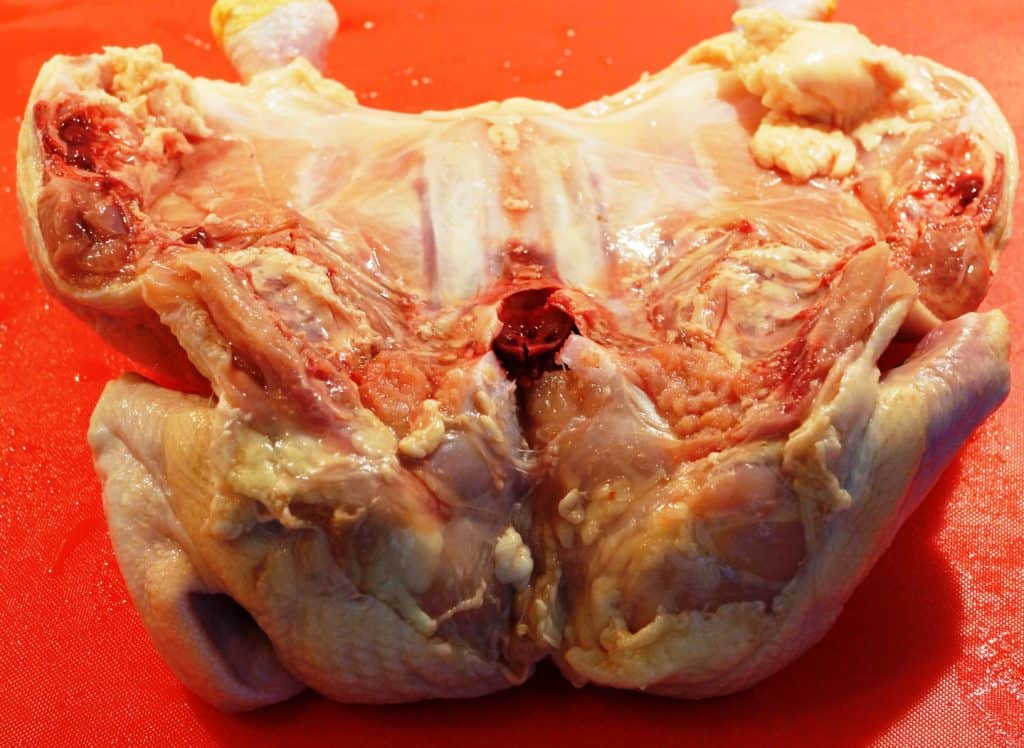
With the backbone removed, open the chicken. You will notice that it will not quite lay flat, so we need to cut the cartilage just above the breastbone. In the picture below, the dark reddish circle in the center of the chicken is the breastbone. The cartilage (already cut in the picture) is 6 o'clock to the breastbone. Simply use the kitchen shears or a sharp knife to cut though this cartilage, and the chicken will now lay flat.

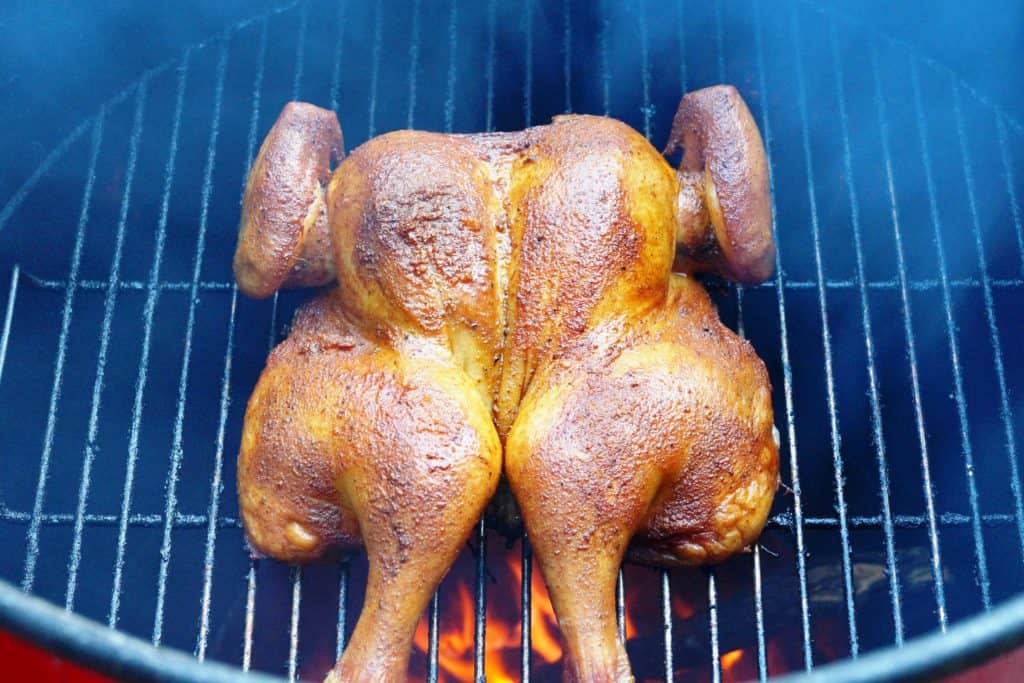
Finally, flip the spatchcocked chicken over. The final step is to tuck the wing tips under the rest of the wing, so they cook more evenly. I like to apply my BBQ rub before doing this. For this chicken I used a savory homemade rub but use your favorite. Plowboy's Yardbird is very popular and a good one to start with if you can't decide. Make sure the surface of the chicken is dry before applying the dry rub, then season the entire chicken with the rub. We like to loosen the skin above the chicken breast and apply some of the rub under the skin as well.

Cooking Whole Chicken Hot and Fast
Why cook chicken hot and fast?
Cooking smoked chicken at a higher temperature maximizes the juiciness and flavor of the chicken while avoiding that dreaded rubbery skin that can often occur with chicken smoked at lower temperature. The higher temps allow the fat under the skin to fully render and the skin to crisp up while still keeping the flavorful chicken meat juicy and tender.
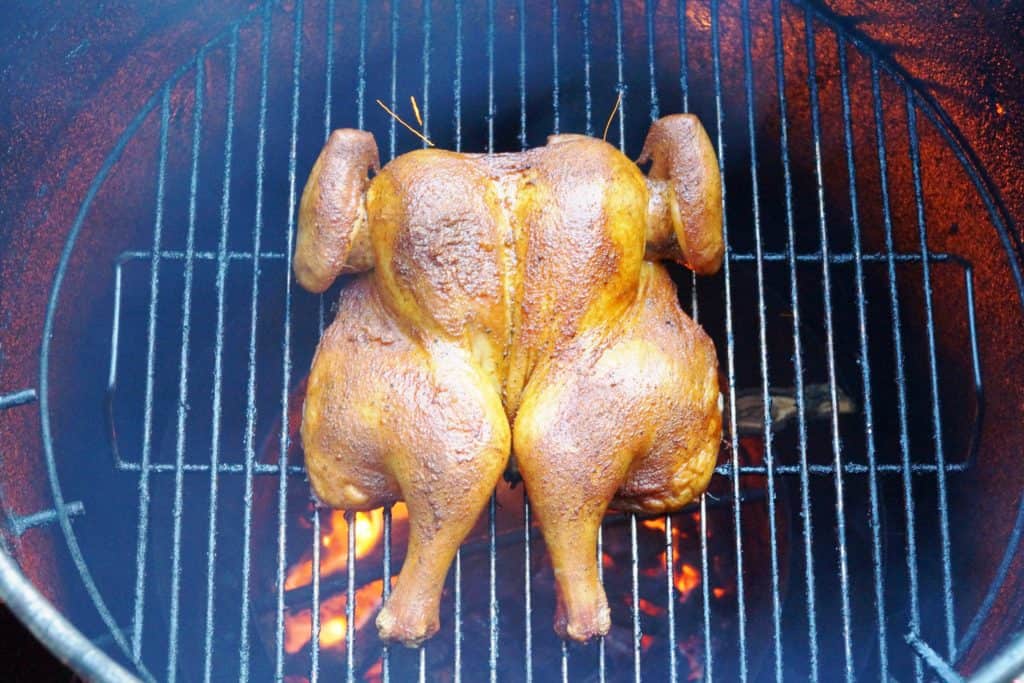
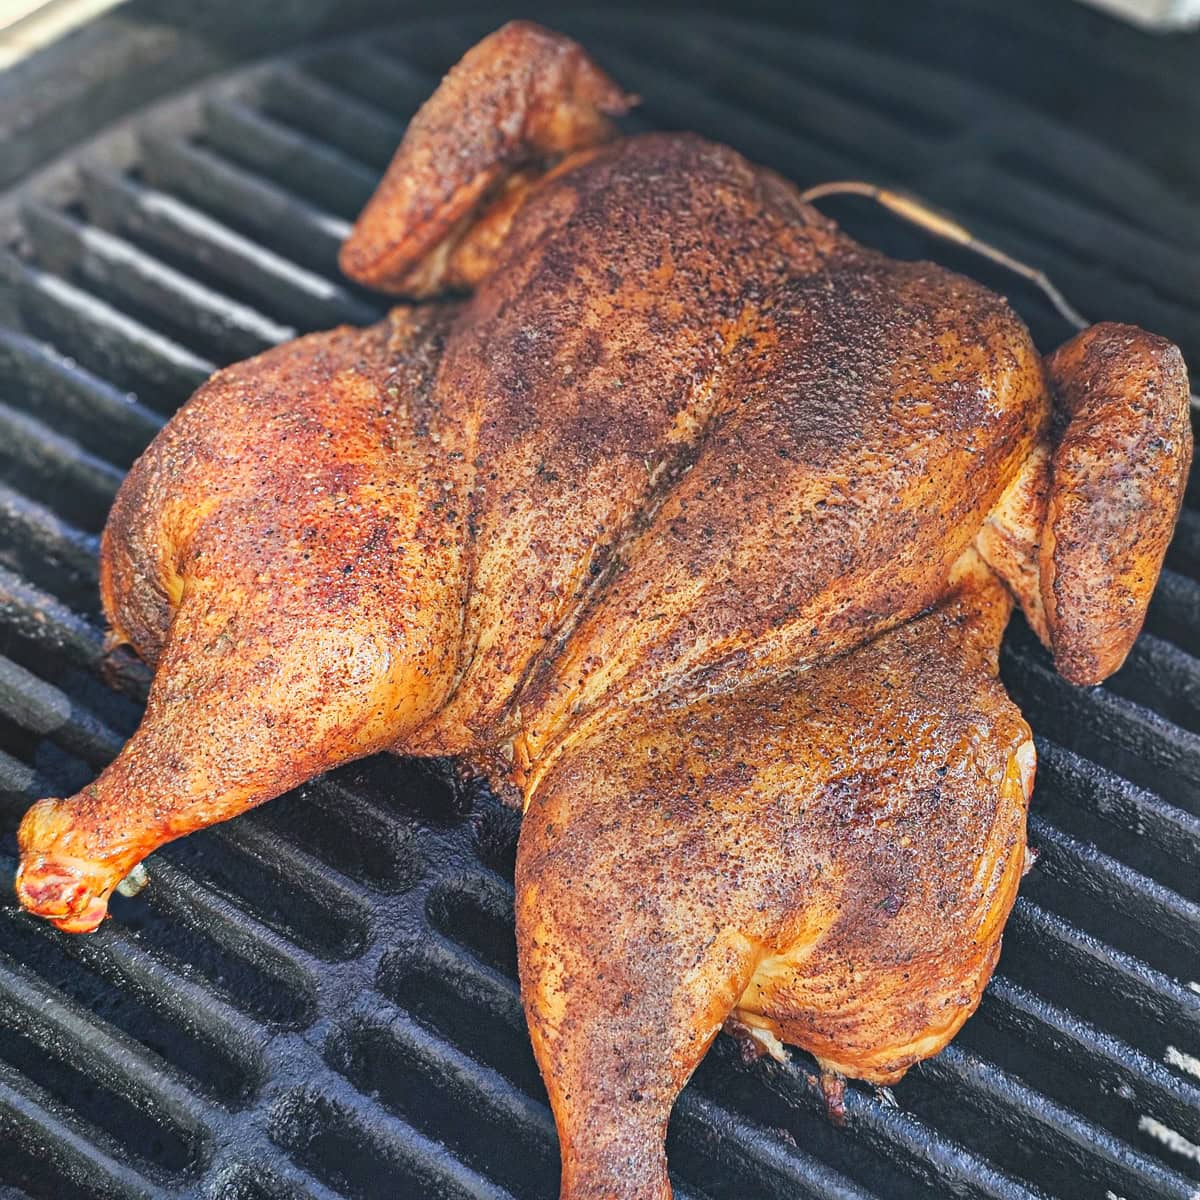
To cook the spatchcock chicken, simply apply your favorite rub, then heat up your smoker to 325-350 degrees. For this cook I am using a Gateway Drum Smoker, which has pretty much become my go to smoker when I am cooking between 250 and 350 degrees and for foods I like a little more smoke flavor on, but you can use any smoker for this. It is definitely a Hot and Fast cooking machine.

I highly recommend monitoring the cook with an in-meat thermometer. Monitor the chicken internal temperature in the thickest part of the thigh and the breast. Simply using time and temp when cooking meat, especially larger cuts, is the number one mistake I see people make. The cooking times given are purely guidelines to give you an estimate, but the meat is done when it is done. You can learn a little more about in meat thermometers here:
Typically, the chicken takes about 1.5-2.5 hours to cook. Check on it about every half hour and turn the grate 90 degrees to help it cook more evenly. When the chicken is nicely browned or if the skin begins to look dry, baste with a little butter. You can also use a competition hack and spritz with some Parkay Vegetable Oil Spray.
Safe Cooking Temps for Chicken
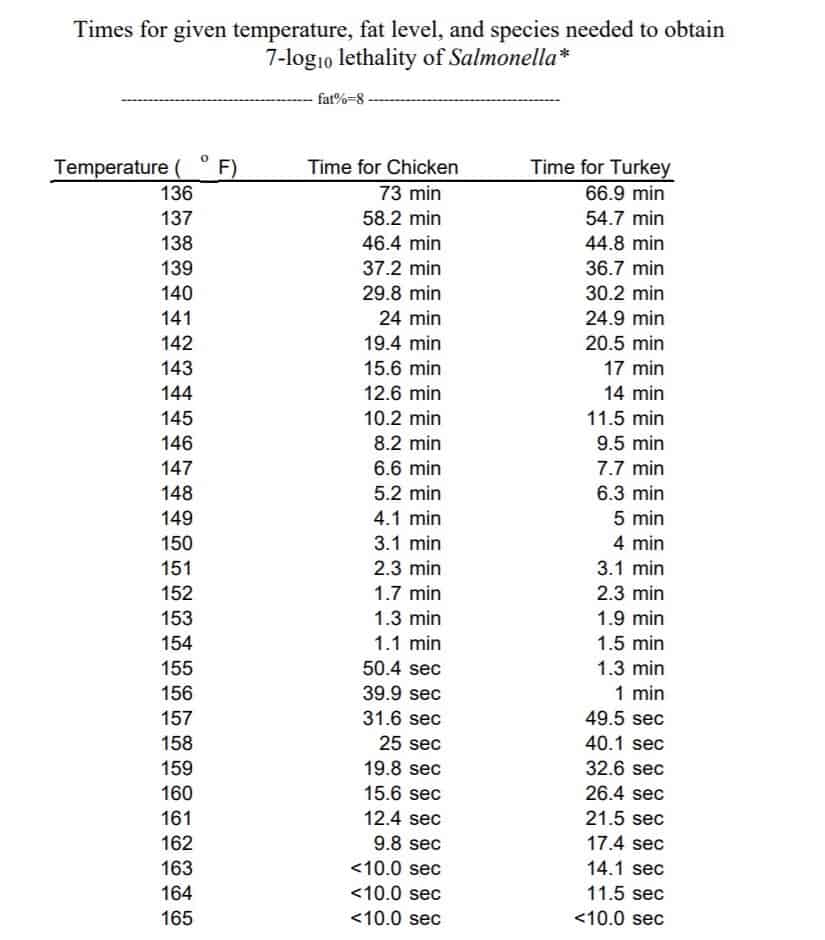
The desired internal temperature of the meat is a matter of much debate and discussion. The USDA recommends cooking chicken to 165 degrees. The problem with this is, at this temp the white meat is typically dry and the dark meat is still rubbery. What most people do not realize is the time at a specific temperature matters just as much as the temperature itself. For example, cooking a chicken to 150 degrees and keeping it at or above that temp for 3 minutes has the same safety profile as cooking a chicken to 165 degrees for 10 seconds. We have included a chart from the USDA for reference, since it all gets a bit confusing.
For our family, the white meat is the favorite part of the chicken, so that is what we monitor. We place our meat thermometer in the thickest part of the breast and aim for about 150-155 degrees, when the breast is still juicy and flavorful. If you cook to 155, chances are you have already been above the 3-minute threshold for 150 degrees F so you are good to go.
When our breast reaches the desired temperature, we also check the temp in the thigh with an instant-read thermometer to see how it is doing. Ironically, even though it is safe to eat using the same guidelines, dark meat is best when cooked to about 175 to 185 degrees F or it tends to be rubbery. If you are more of a dark meat fan then monitor the meat in the thigh and pull at desired temp, just know the breast meat may suffer a bit.
If you plan on using this for pulled chicken, then cook to about 170 degrees in the thigh. The carry over temp will bring it to 175 during the rest, and you can regain the lost moisture in the breast when you pull the meat and combine it all together.

If your head has not exploded yet and you have decided on a finished temp and achieved that goal, then remove the whole spatchcock chicken to a large cutting board, tent with aluminum foil and let it rest for about 5-10 minutes at room temperature.
What to Serve with Hot and Fast Smoked Chicken
From here, you have countless options. You can remove the legs, wings, and breast to serve whole, or you can do my kids favorite: pulled chicken. You can also use the meat in recipe that calls for a rotisserie chicken like our King Ranch Chicken or White Chicken Chili.
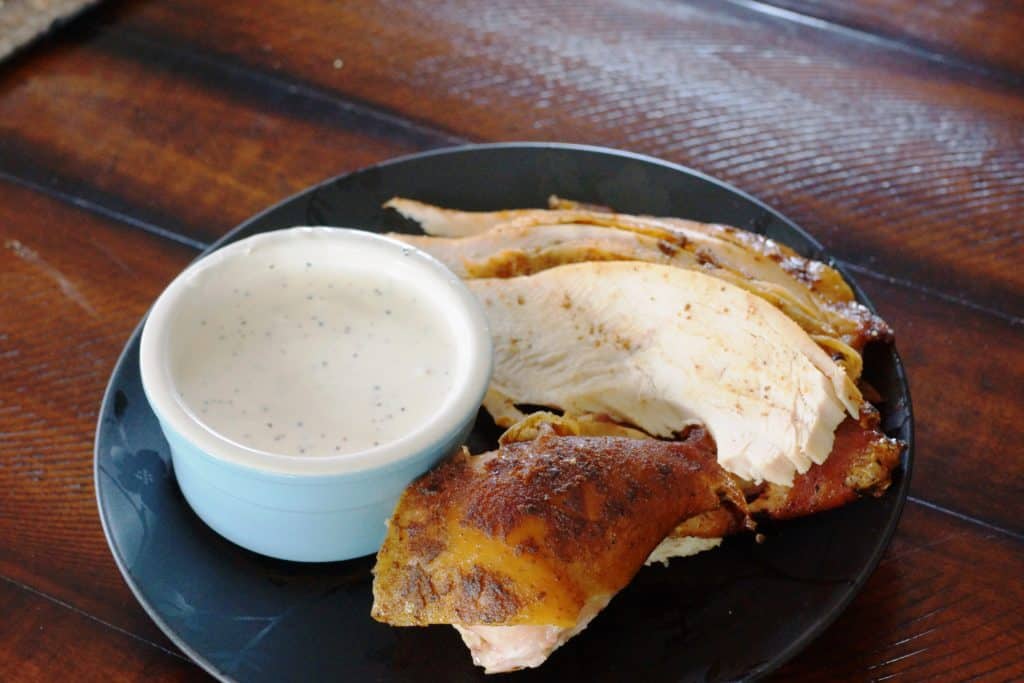
We love to slice up the breast, give the legs to our son, who LOVES drumsticks, and use the rest as pulled chicken. All methods of this chicken dinner go great with a side of Alabama White Sauce or your favorite BBQ sauce.
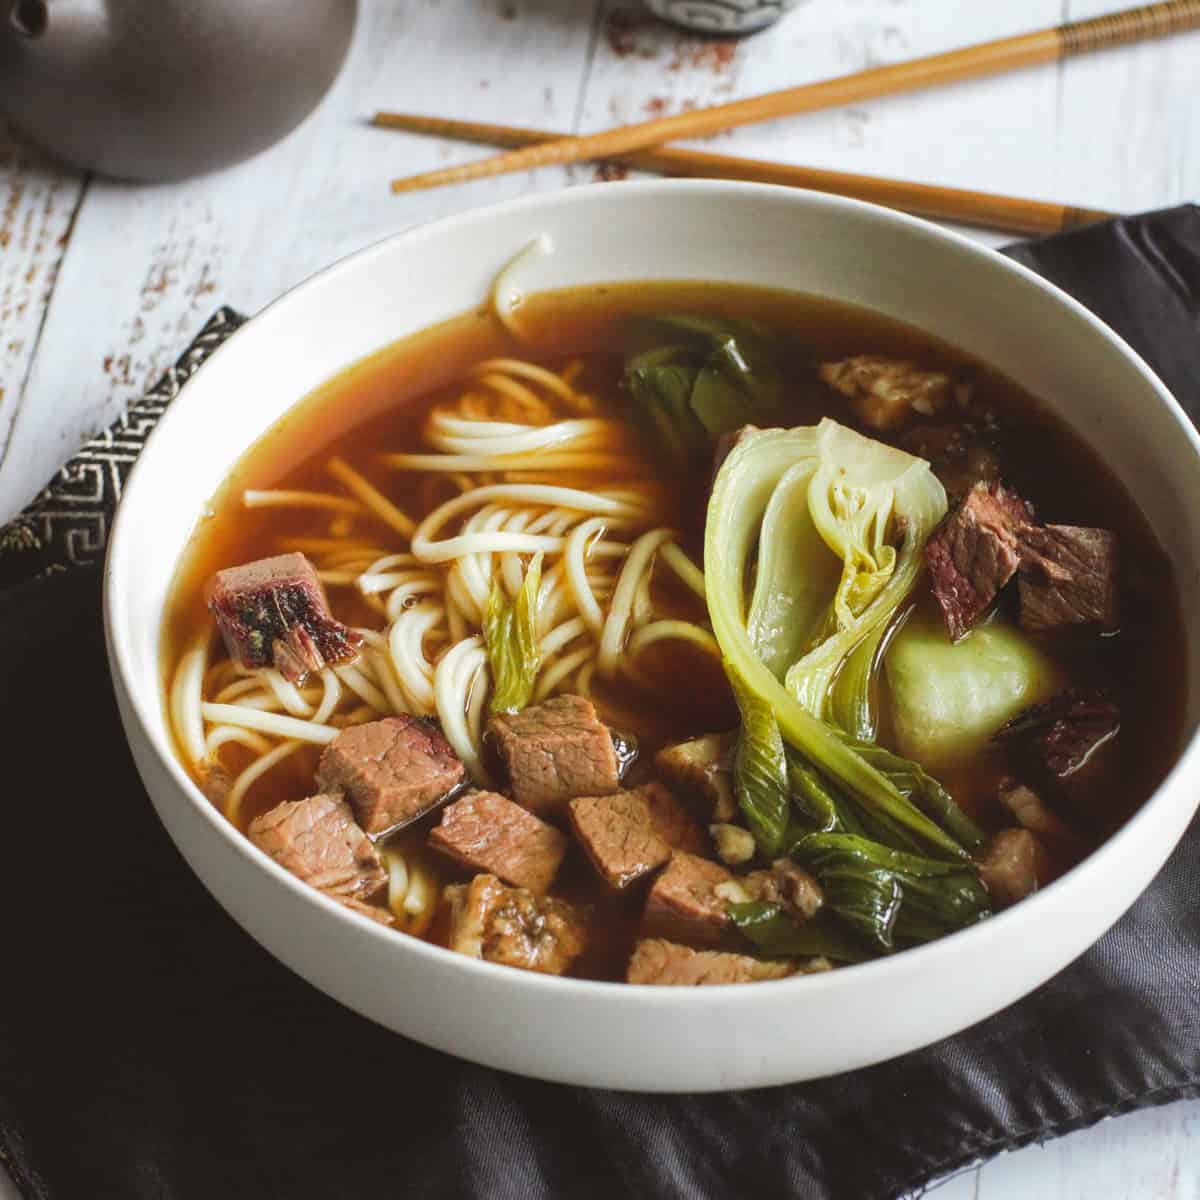
Serve with your favorite barbeque side dishes:
- Kansas City Style Cheesy Corn and Smoked Ham Bake
- Skillet Cornbread with Green Chiles and Toasted Cumin
- Lexington Style Red Coleslaw
- Jalapeno Coleslaw With Bacon Aioli
- Chicago Style Smoked Rib Tips
- Smoked Au Gratin Potatoes
- Smoked Hatch Chile Mac and Cheese
Frequently Asked Questions
Whole chicken is best cooked hot and fast at temperatures of 325-350 degrees. This allows the skin of the chicken to crisp up while still giving a great smoky flavor to the chicken.
If cooked correctly, chicken can be safe to eat at 155 degrees. The 165 degrees recommended by the USDA is the temp need to kill bacteria in under 10 seconds. Holding the chicken at 155 degrees or above for about 1 minute will result in the same lethality for salmonella.
White meat chicken is very lean and prone to drying out, especially if cooked to temperatures above 165 degrees.
Spatchcock chicken is a superior methods of cooking chicken evenly. While beer can chicken sounds and looks cool, it carries increased health risks and often results in the chicken cooking unevenly.

Thank you for taking the time to visit our blog. If you tried and enjoyed our recipe please share with others and please leave us a comment and review. We also love to see your pics so don't forget to tag us @Carne_Diem_Culinary or #CarneDiemBlog. To be notified of future recipes please follow us on Facebook, Instagram, or Pinterest, or sign up for our e-mail notifications. Until next time, Carne Diem!
📖 Recipe

Hot and Fast Smoked Spatchcock Chicken
Equipment
- Smoker
- Kitchen shears
Ingredients
- 1 Whole Chicken
- Favorite BBQ Rub for Poultry
- Parkay Vegetable Oil Spray
Instructions
- Spatchcock your chicken following the instructions above.
- Preheat your smoker to 325-350 degrees.
- Apply rub to the chicken. Use your fingers to separate some of the skin from the meat and sprinkle some rub beneath the skin.
- Cook the chicken to the desired temperature. White meat is best at about 155-165 and dark meat is best at between 175-185. *See note above about safe temps for chicken.
- When the skin reaches your desired color, start spritzing with the Parkay to prevent the skin from becoming too dark.
- Let the chicken rest for about 5 minutes before serving.

Comments
No Comments