Last Updated on November 16, 2023 by Carne Diem
Protein: 
Origin: Russian/French, European
Method: Stovetop
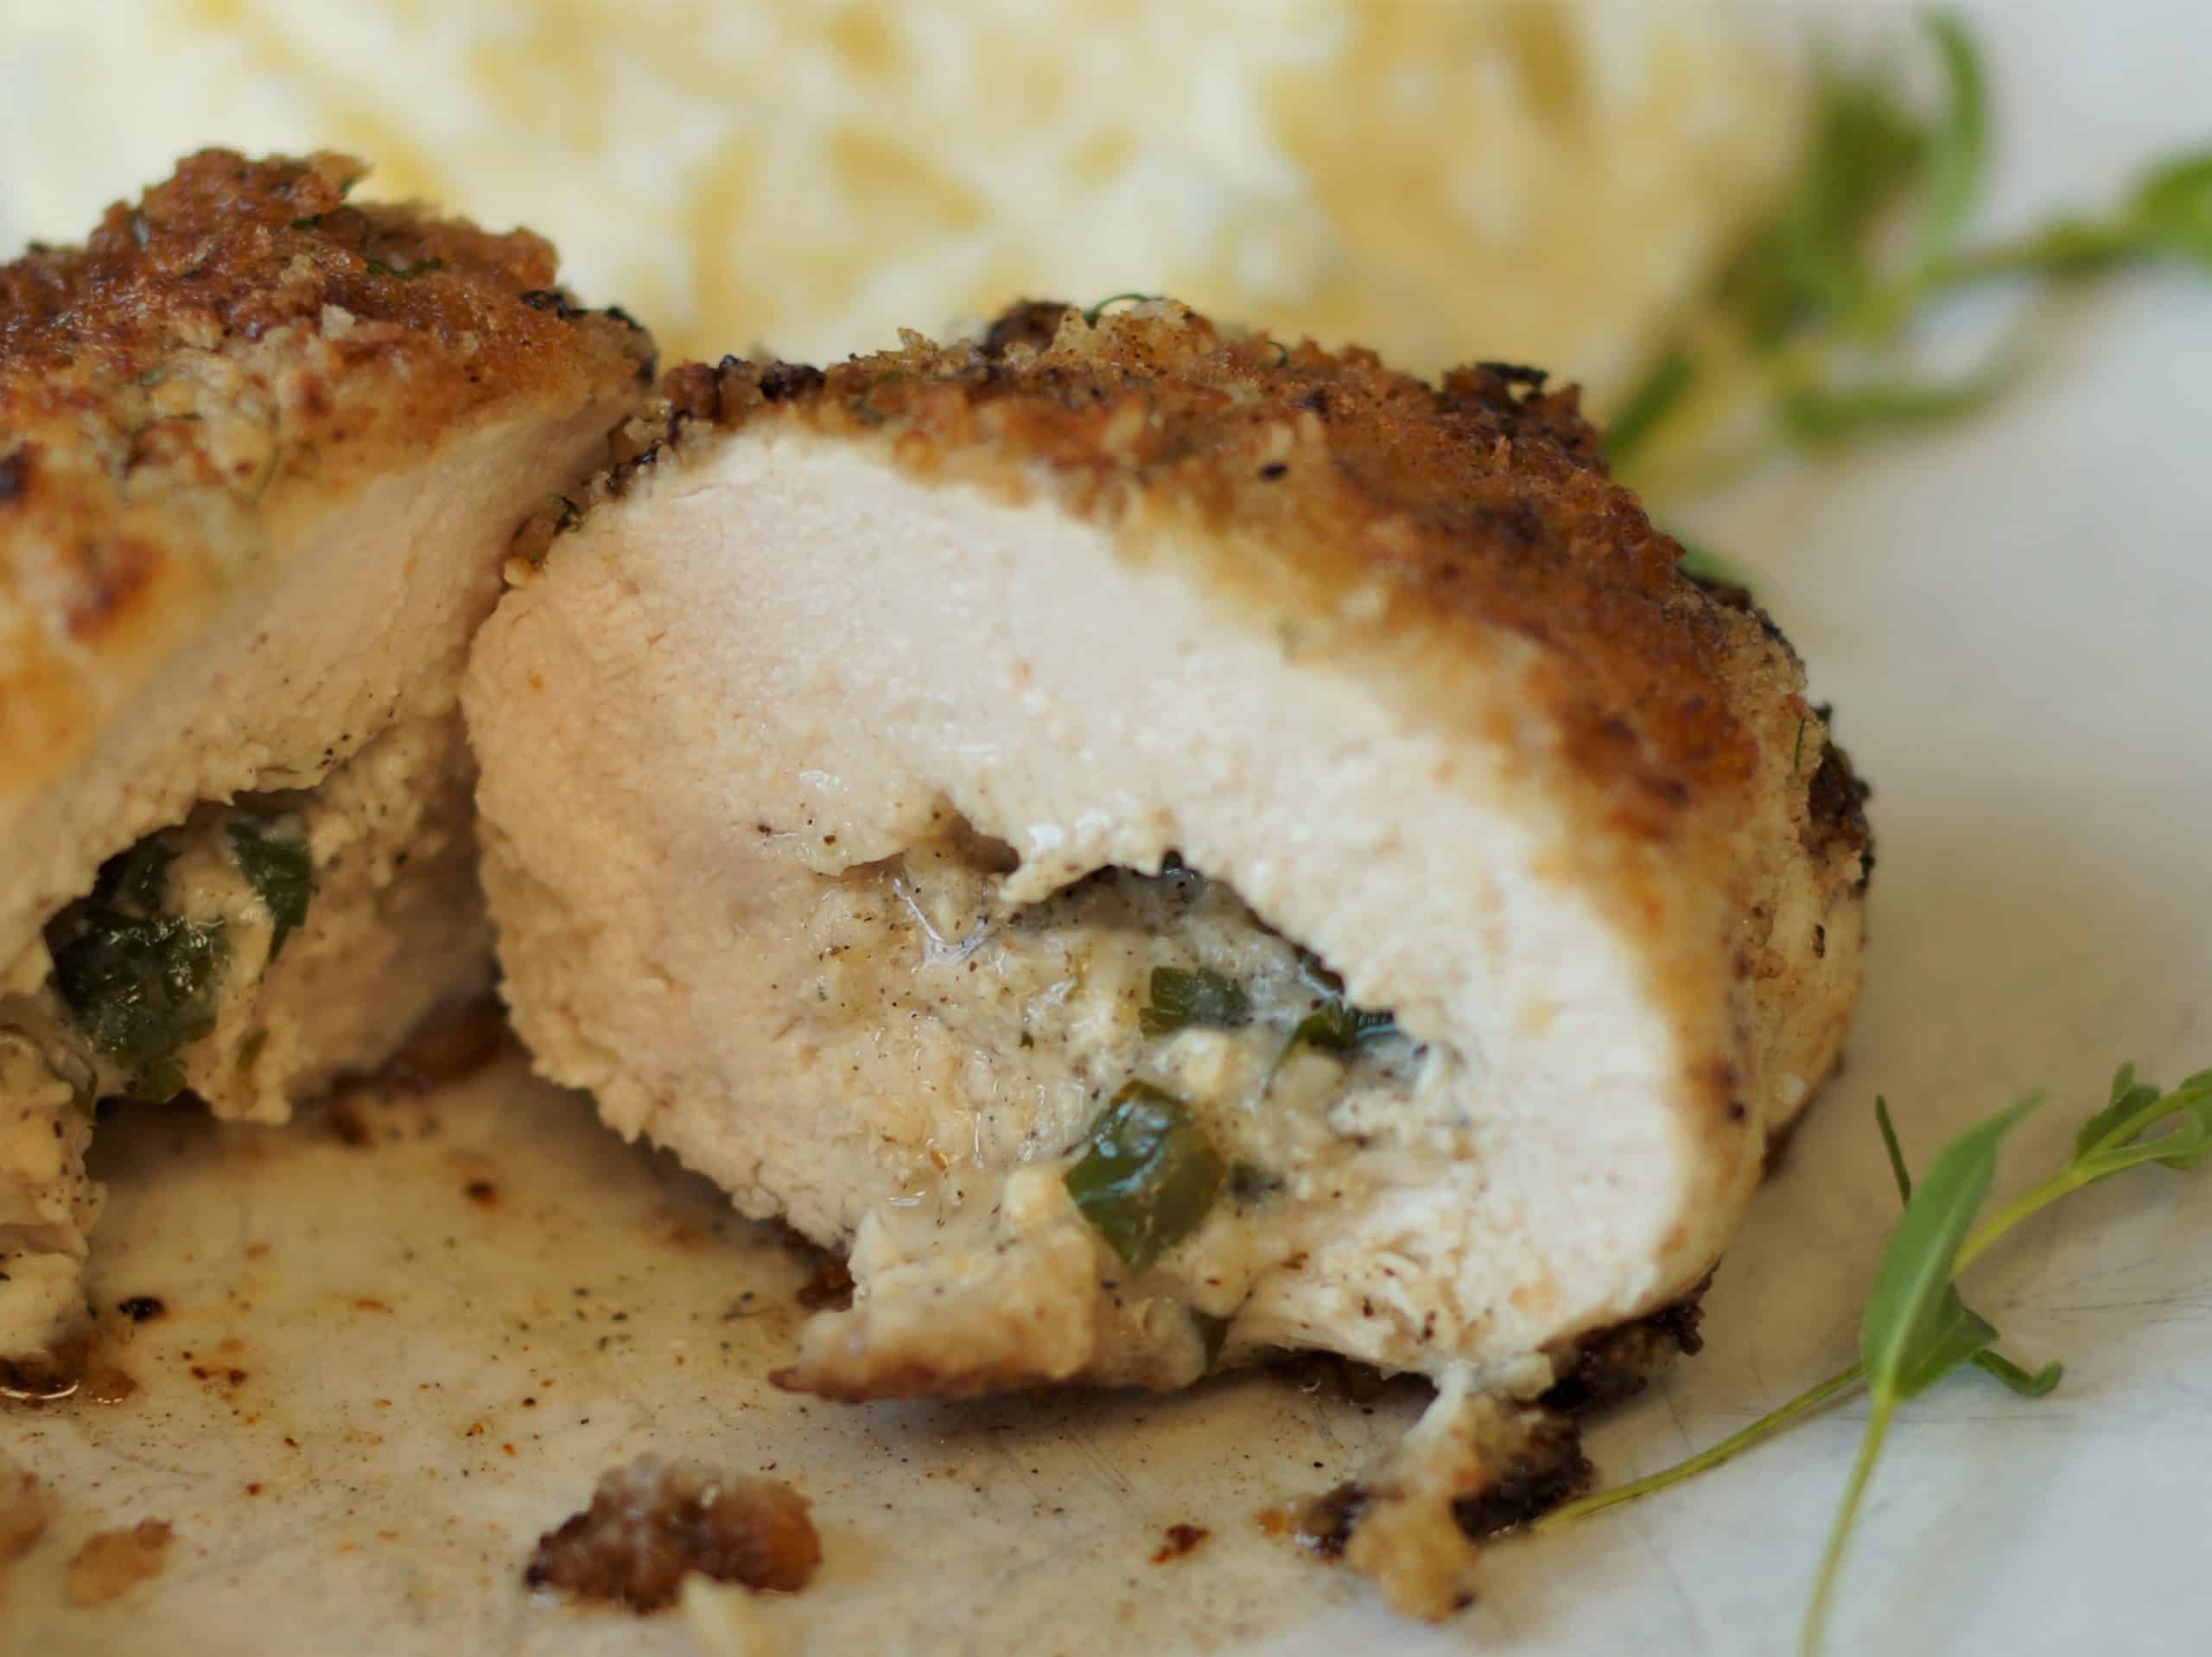
Jump to RecipeThis Chicken Kiev recipe with fresh herb butter is a family favorite. Chicken breasts are stuffed with butter and fresh herbs, breaded and fried until the outside of the chicken is crispy and browned and the inside of the chicken is moist and flavorful.
I was first introduced to this herb butter stuffed chicken while studying abroad in England. Chicken Kiev quickly went from a "what the heck is that" dish to one of my absolute favorites in short order, and was on frequent rotation at the University along with my favorite British dessert, Banoffee Pie. Since returning to the United States he have learned how easy it is to make Chicken Kiev at home, and have included our classic Chicken Kiev recipe and as well as our recipe for smoked Chicken Kiev.
Table of contents
History of Chicken Kiev
Despite being named after the capital city of Ukraine, the origin of the dish is a little murky. More that likely it originated by French chefs in Russia, similar to the backstory of Beef Stroganoff. The dish began to gain popularity in the United States with Russian and Ukrainian immigrants, and only later became popular in Russia and Ukraine.
Making the Best Chicken Kiev with Fresh Herb Butter
Making Chicken Kiev at home requires only basic ingredients, that are easily accessible. To make the homemade Chicken Kiev you just need chicken breasts, panko breading, butter, some fresh herbs, garlic, buttermilk, eggs, and some spices and seasonings. This version does have fresh tarragon in it which can be omitted if you can't find it.
Making the herbed butter
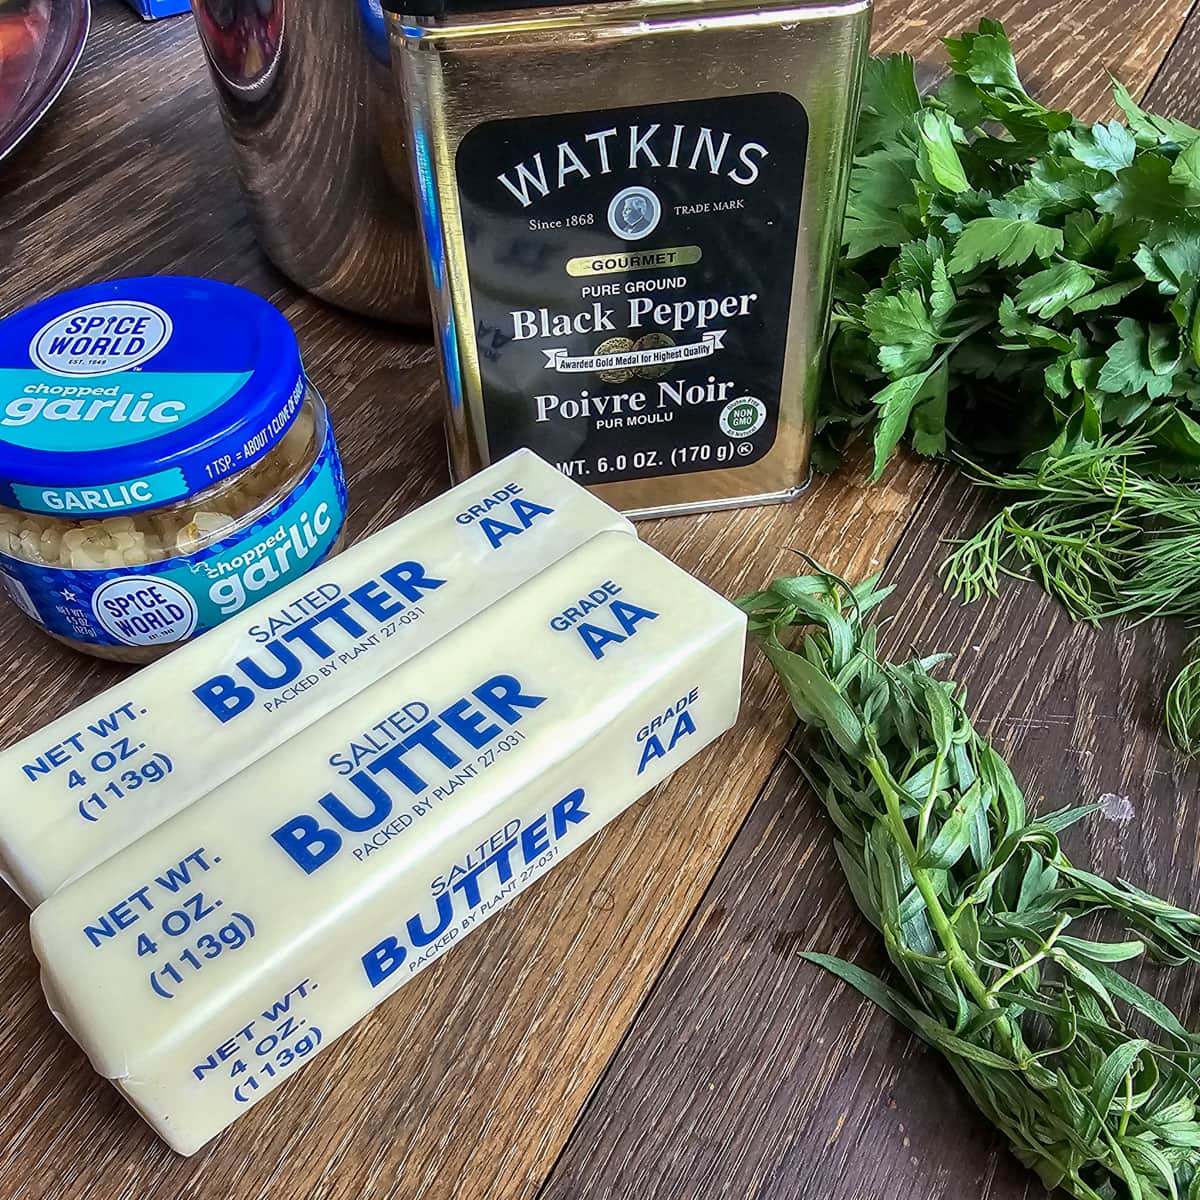
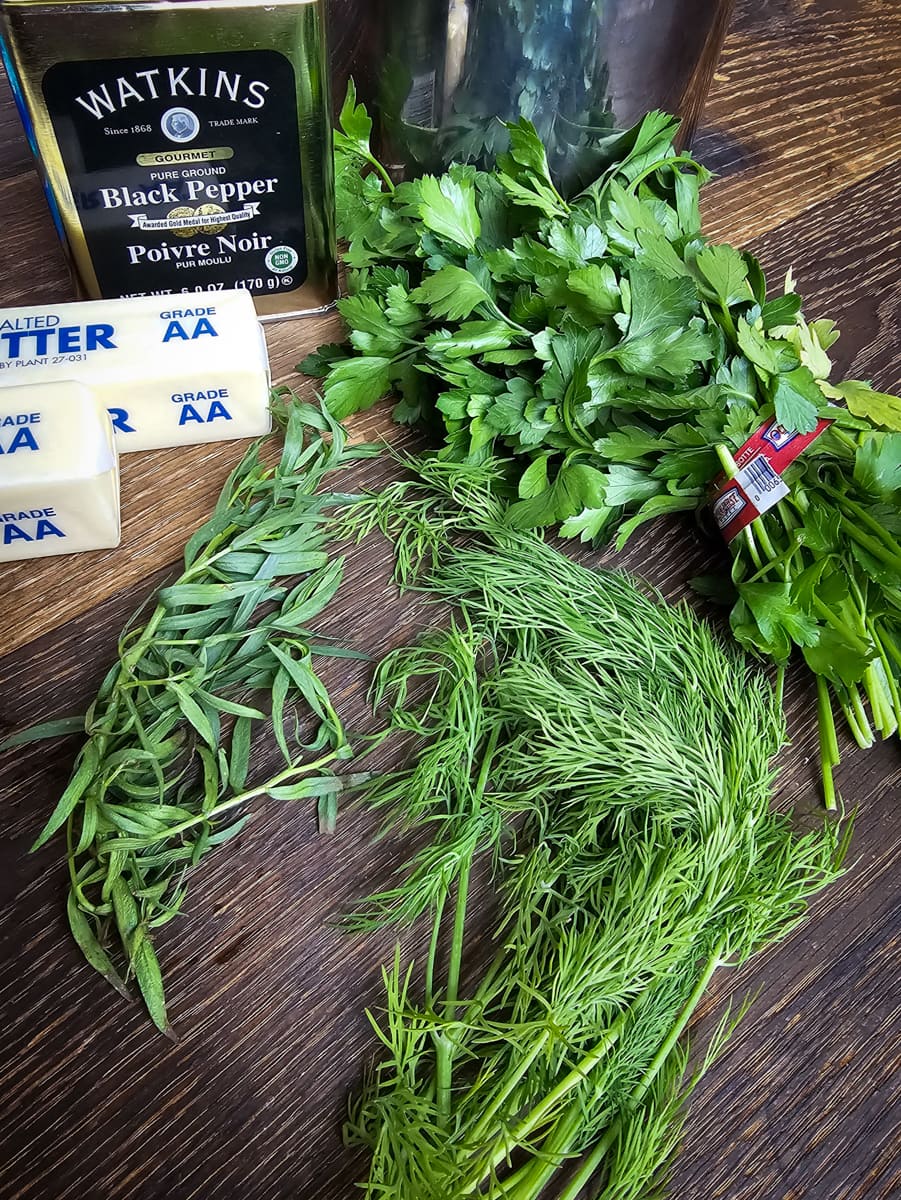
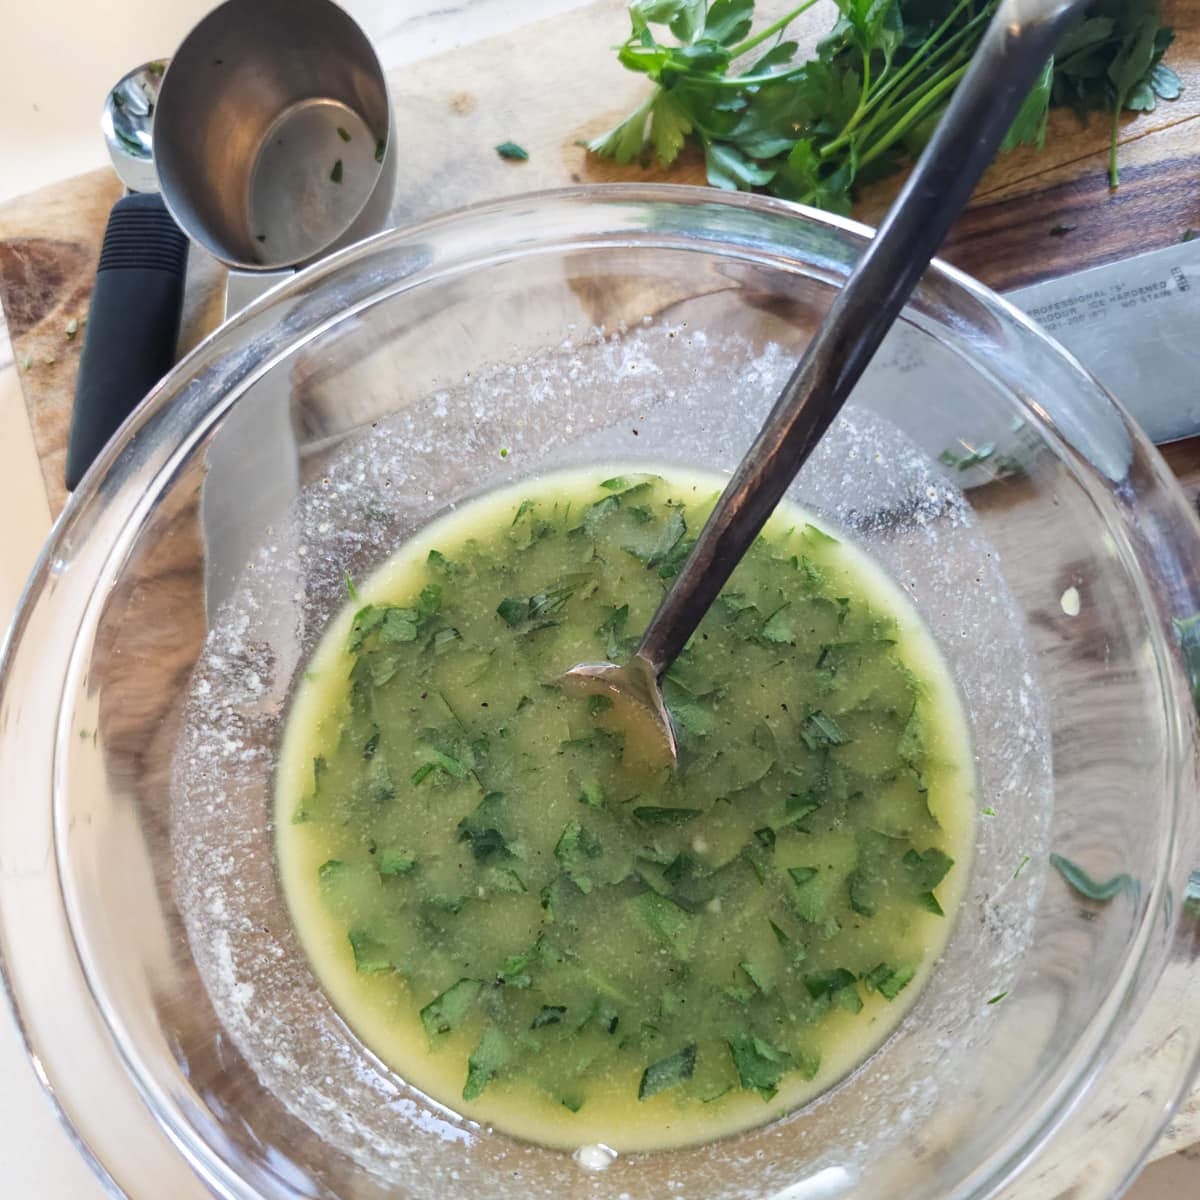
The first step in making the Chicken Kiev is making the butter with fresh herbs. For the herbed butter you will need salted butter, fresh parsley, fresh thyme fresh tarragon, garlic, and black pepper. Fresh herbs are always recommended for this recipe. The herb butter can be made in larger portions and then frozen for future use.
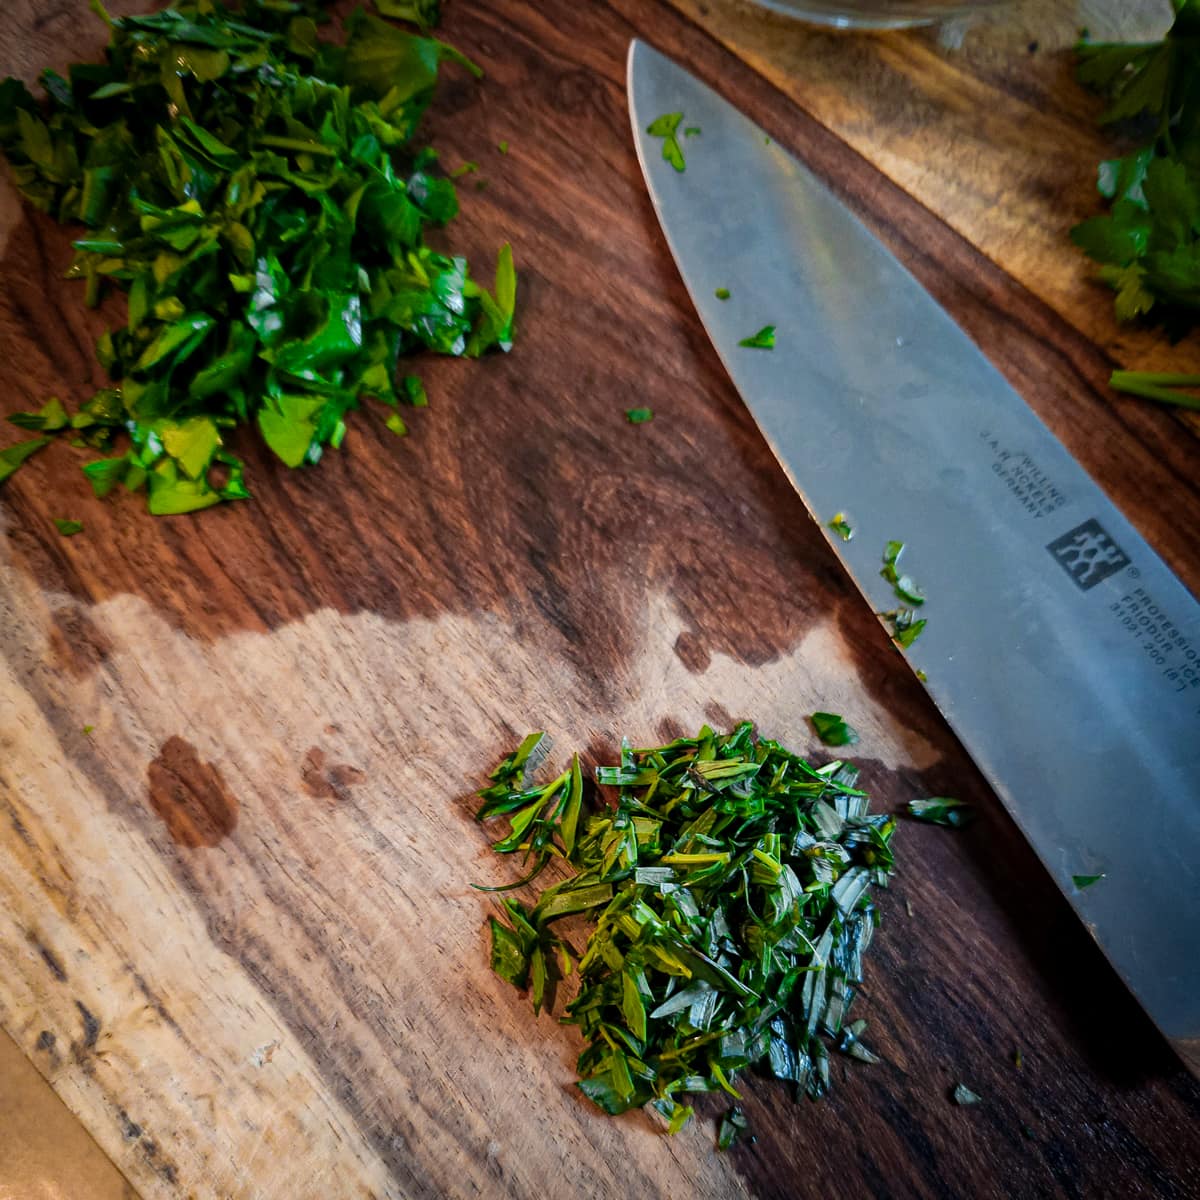
Finely chop the parsley and tarragon and place in a small bowl. Remove the thyme leaves from the stems and add to the bowl.
Melt the butter and add to the bowl with the chopped herbs. Add the pepper and minced garlic and stir well to combine.
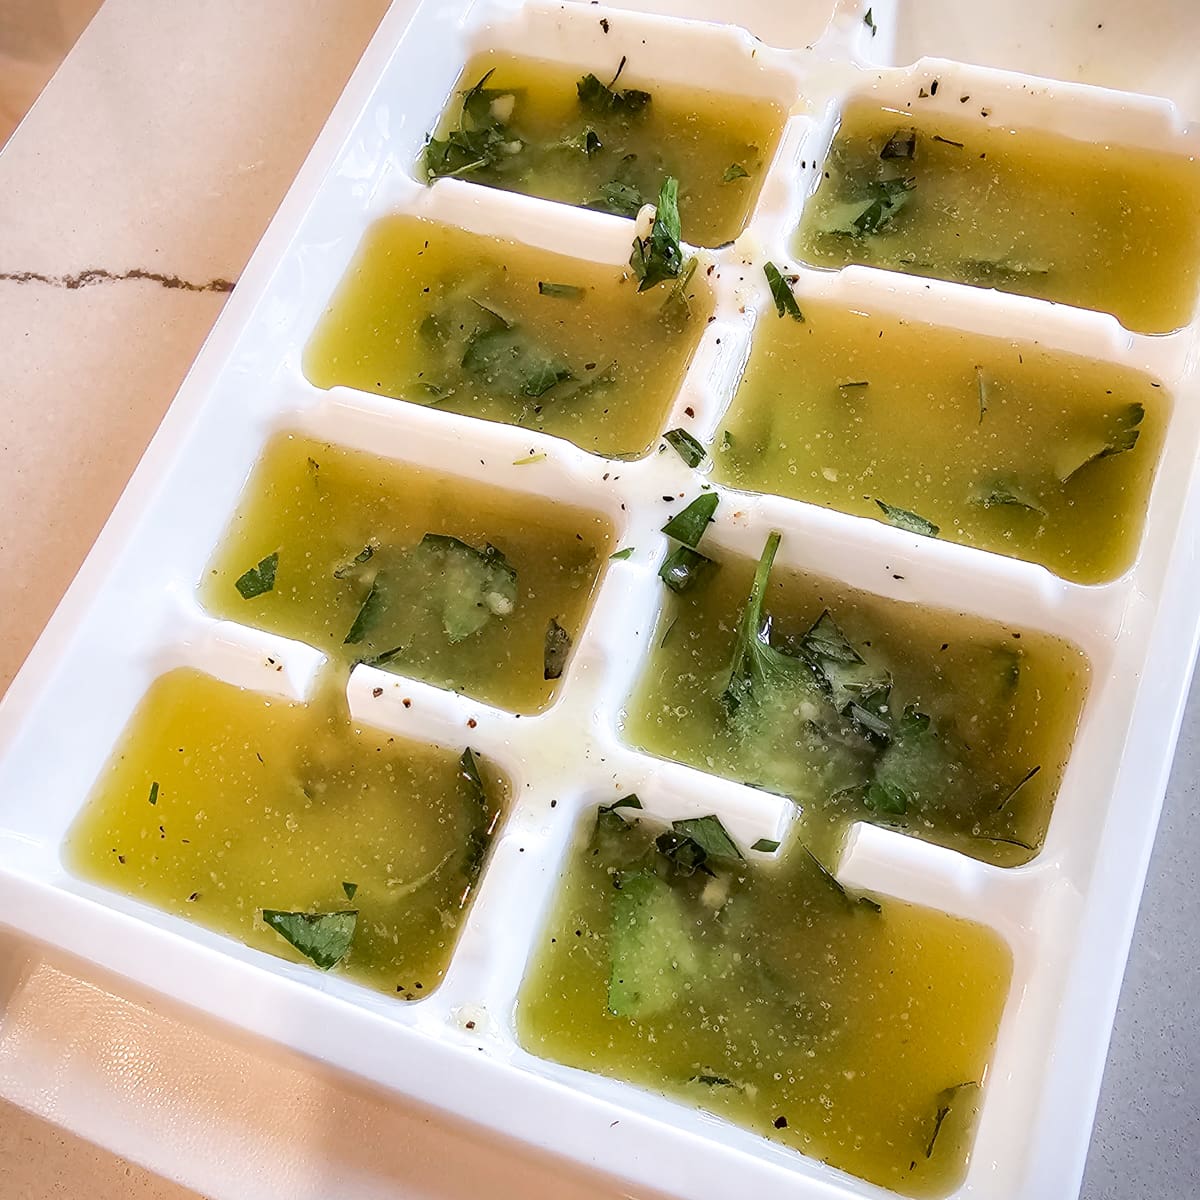
Add the mixture to ice cube trays and place in the freezer for at least 2 hours to solidify.
Making the breading
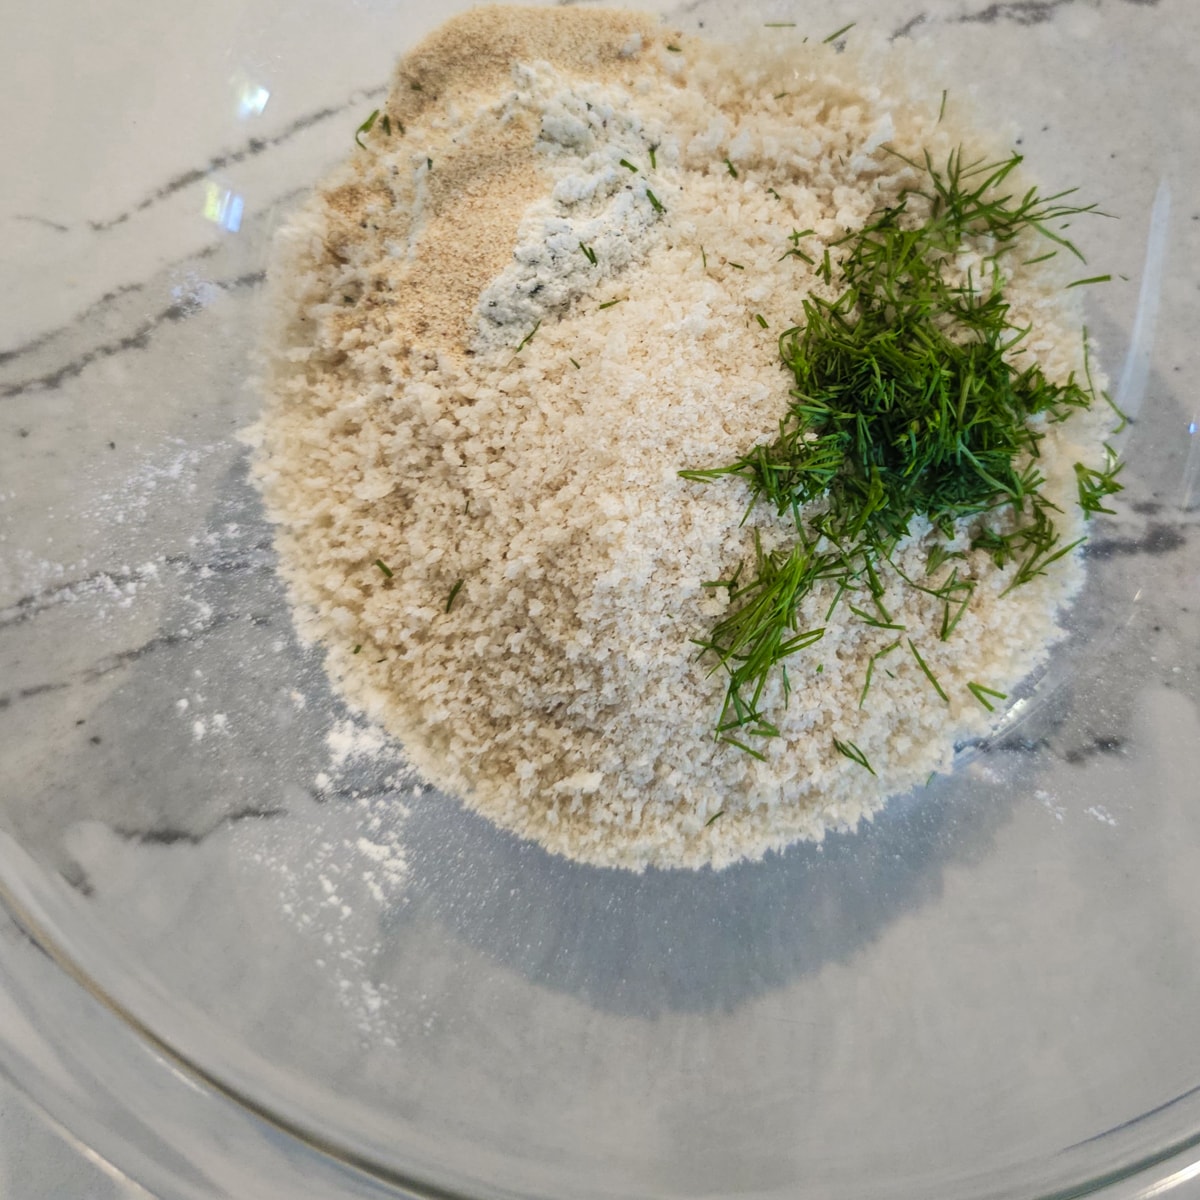
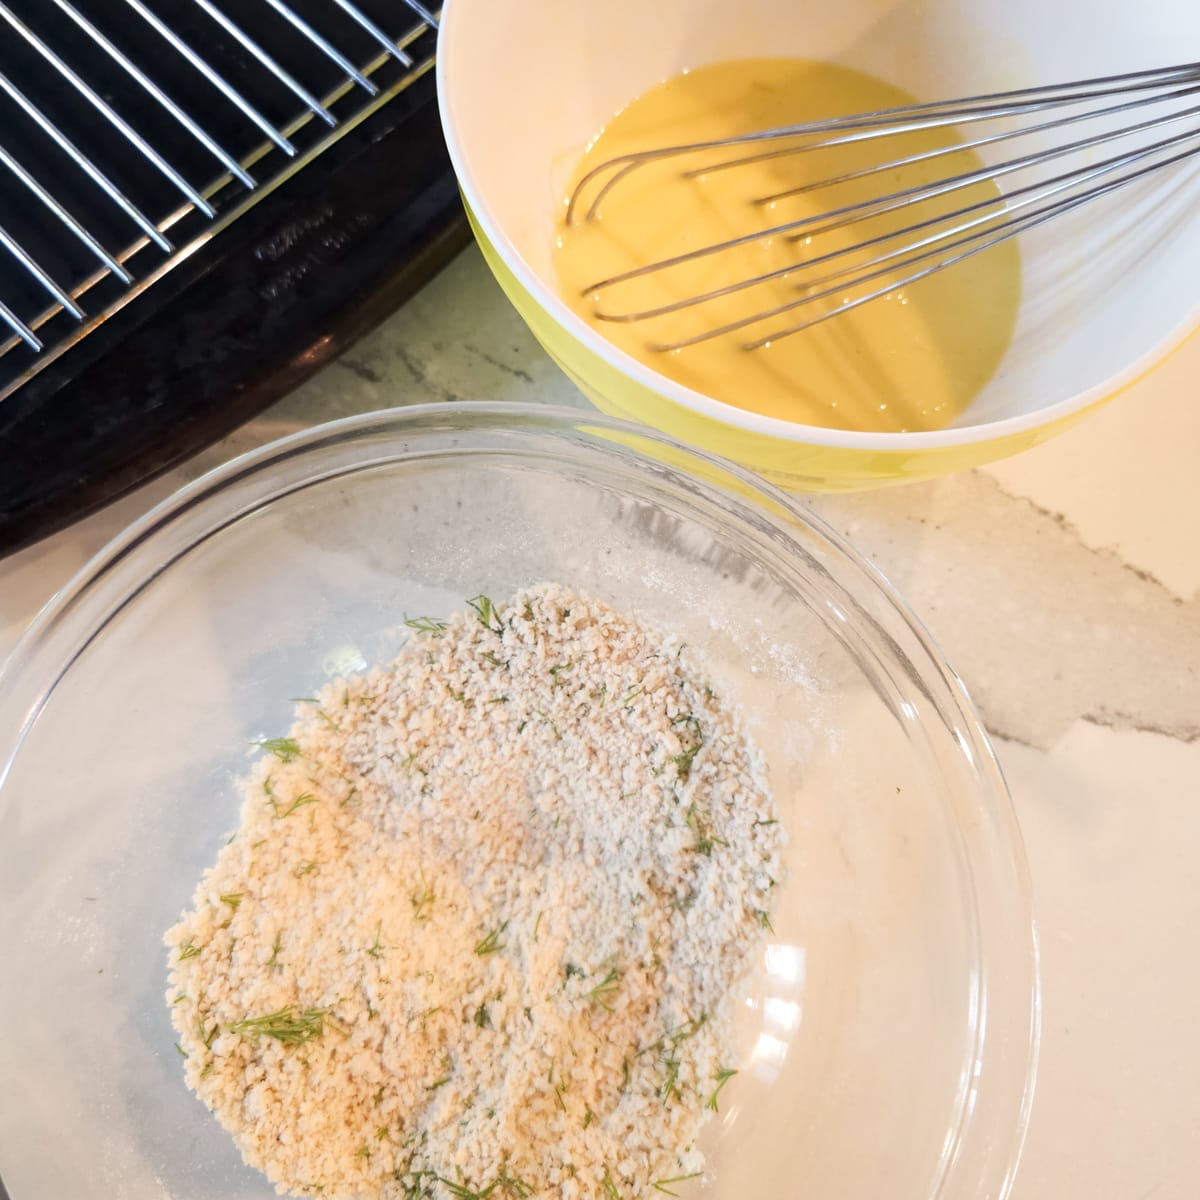
For the Chicken Kiev breading you will need Panko bread crumbs, flour, Ranch seasoning, dill, and garlic powder. You can use traditional plain bread crumbs if you wish but Panko is so much better!
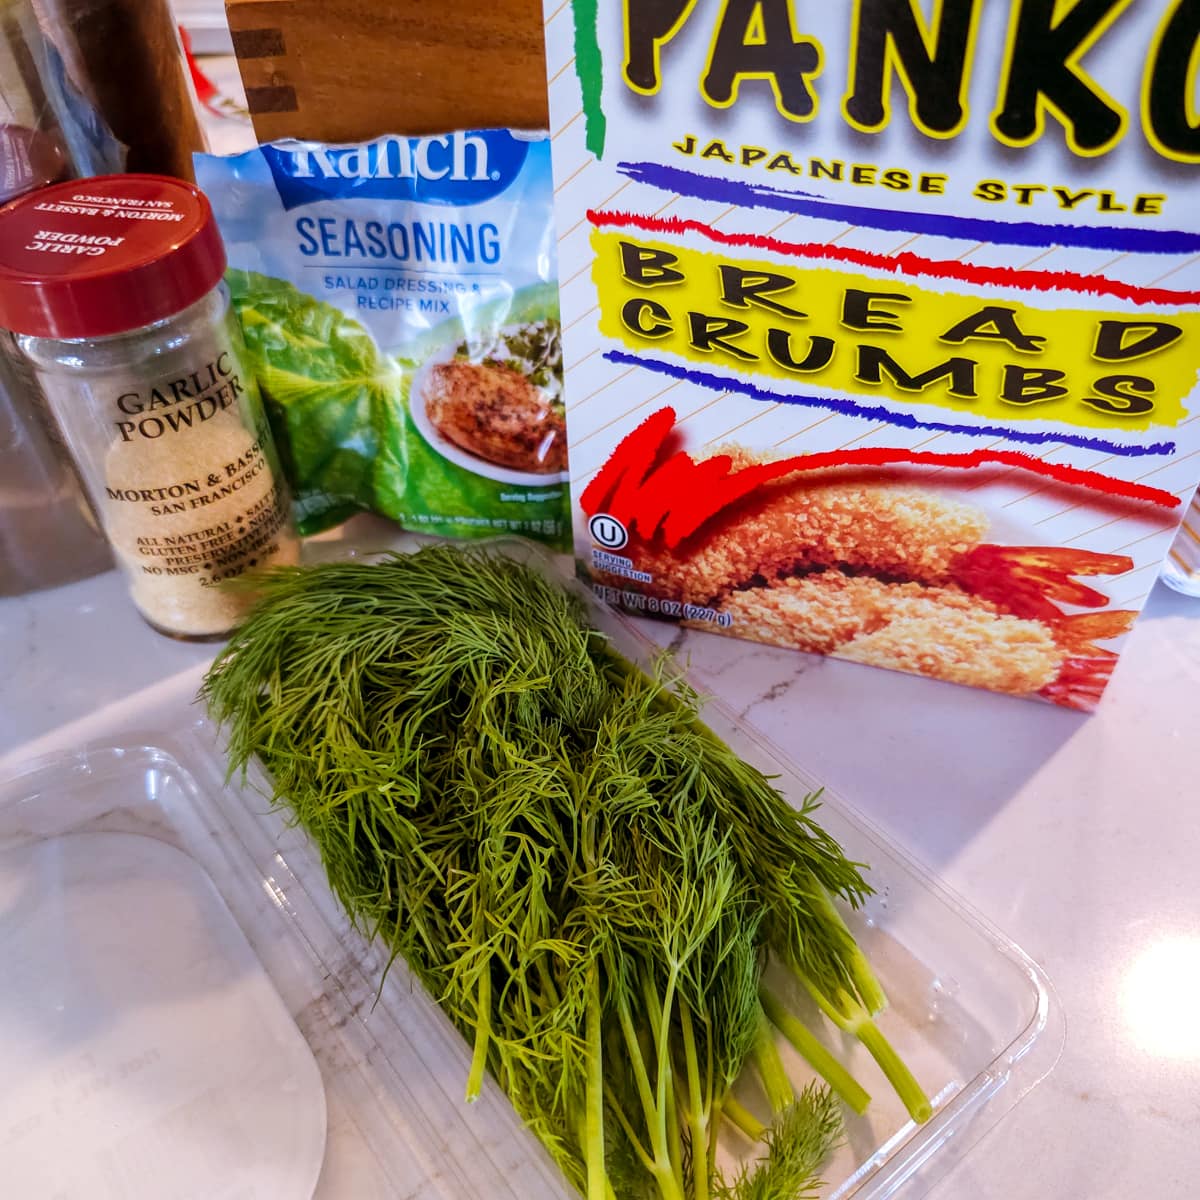
Finely chop the dill and place in a bowl with the panko, flour, and garlic powder. Mix well and set aside.
Preparing the chicken
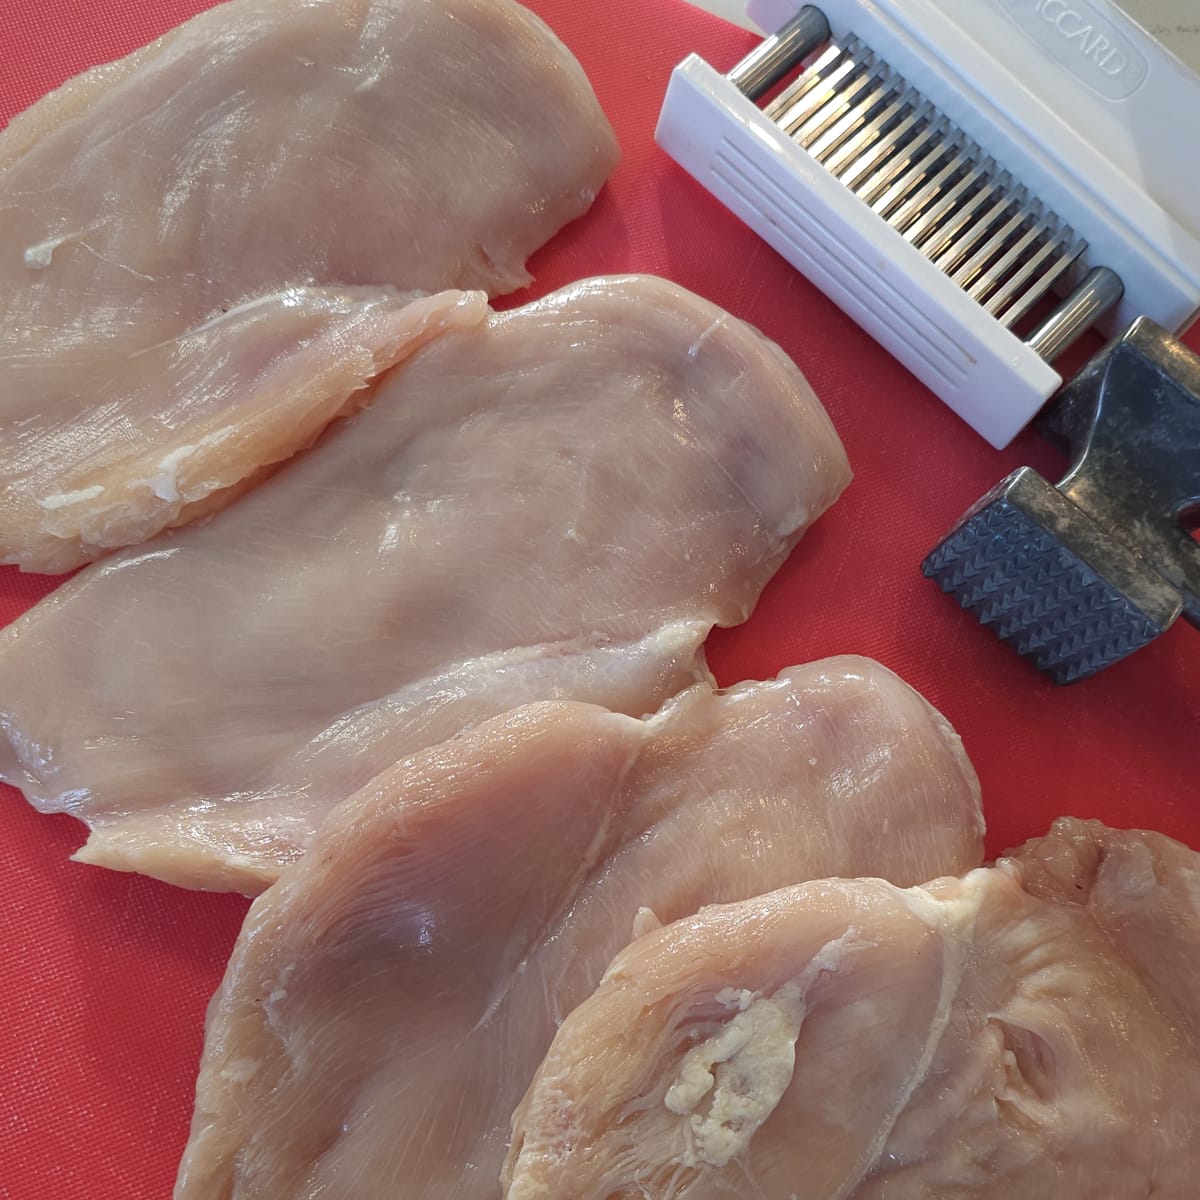
Lay out the chicken breasts and tenderize them with a Jaccard, or place between 2 pieces of parchment paper and pound them with a meat mallet until they are about ¼ inch thick. You want the chicken thin enough and wide enough that you can enclose the fresh herb butter in the center, so you don't lose all of your filling during the cook.
Forming the Chicken Kiev
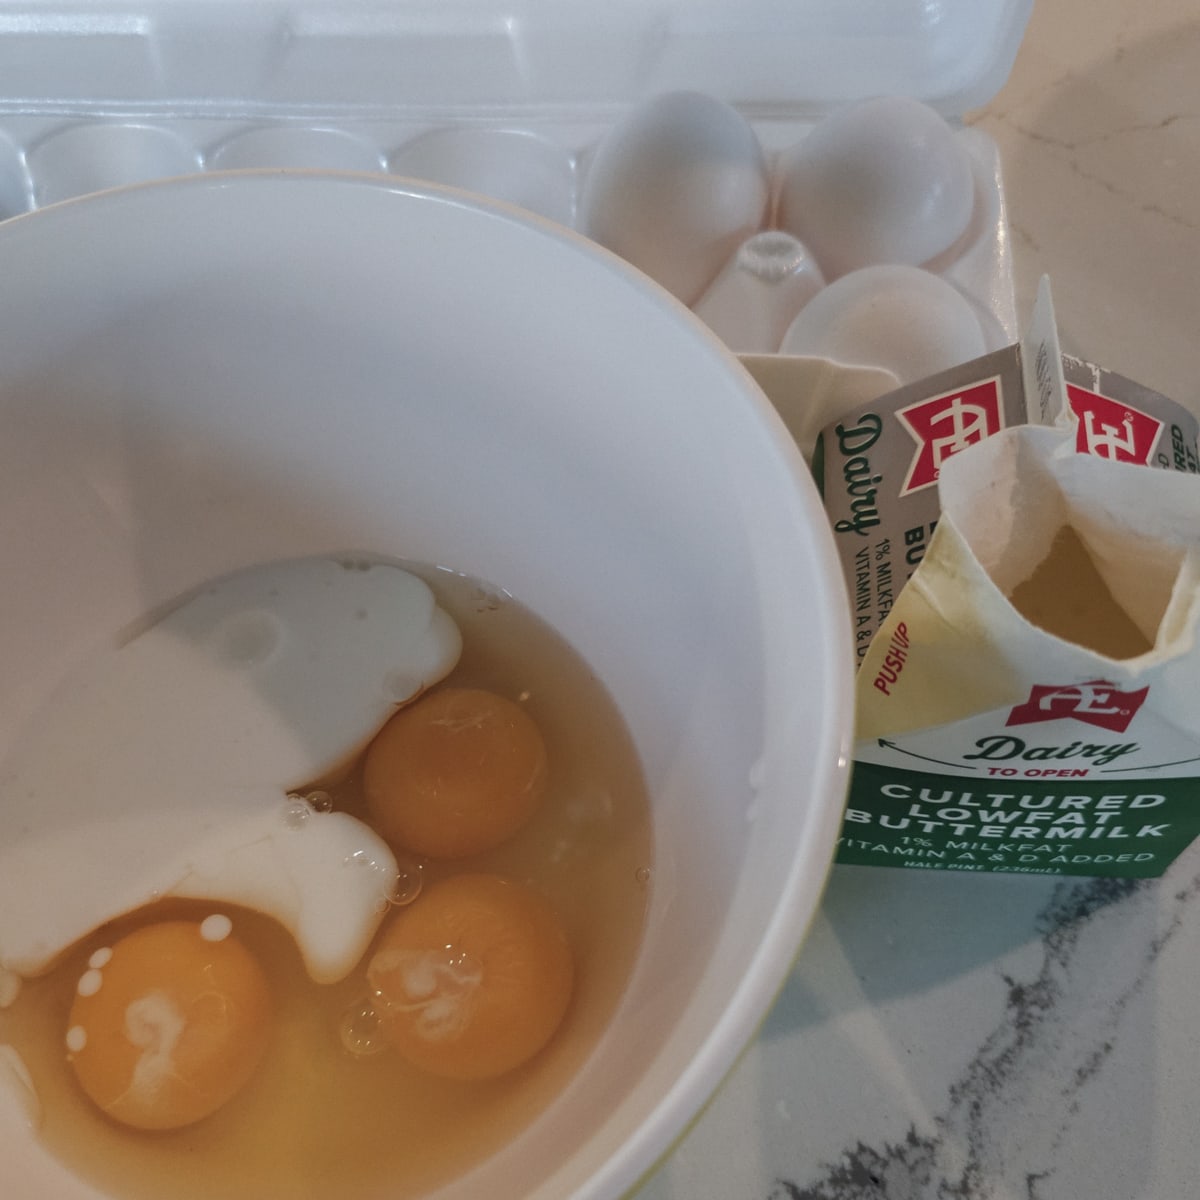
Next you will need to form the butter stuffed chicken breasts and bread the chicken. Beat the eggs with the buttermilk in a small bowl. If you do not have buttermilk, you can substitute regular milk.
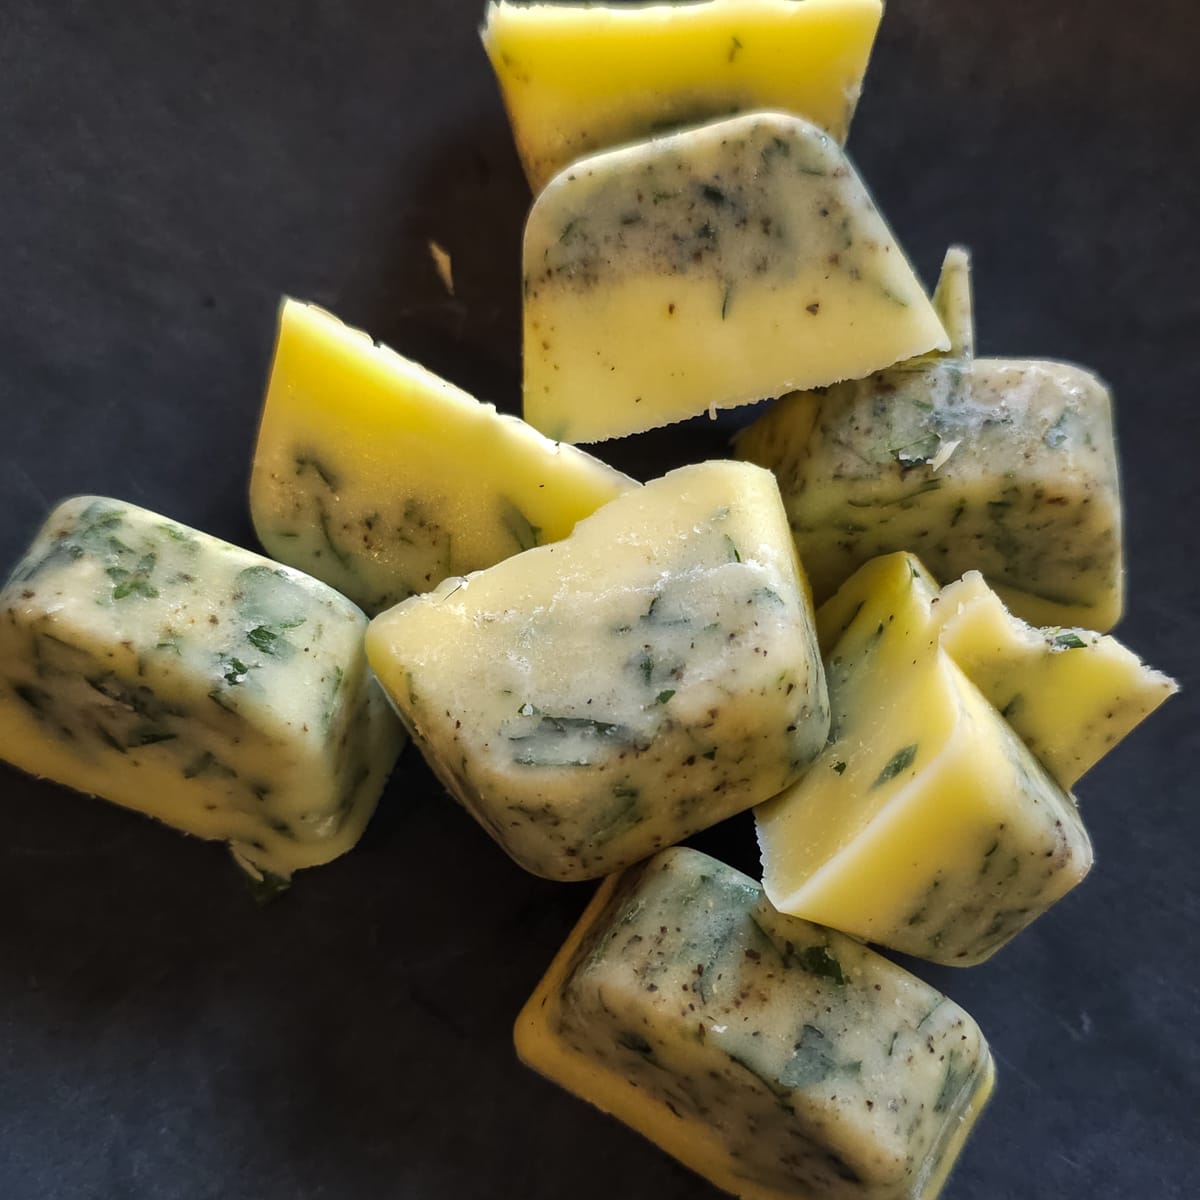
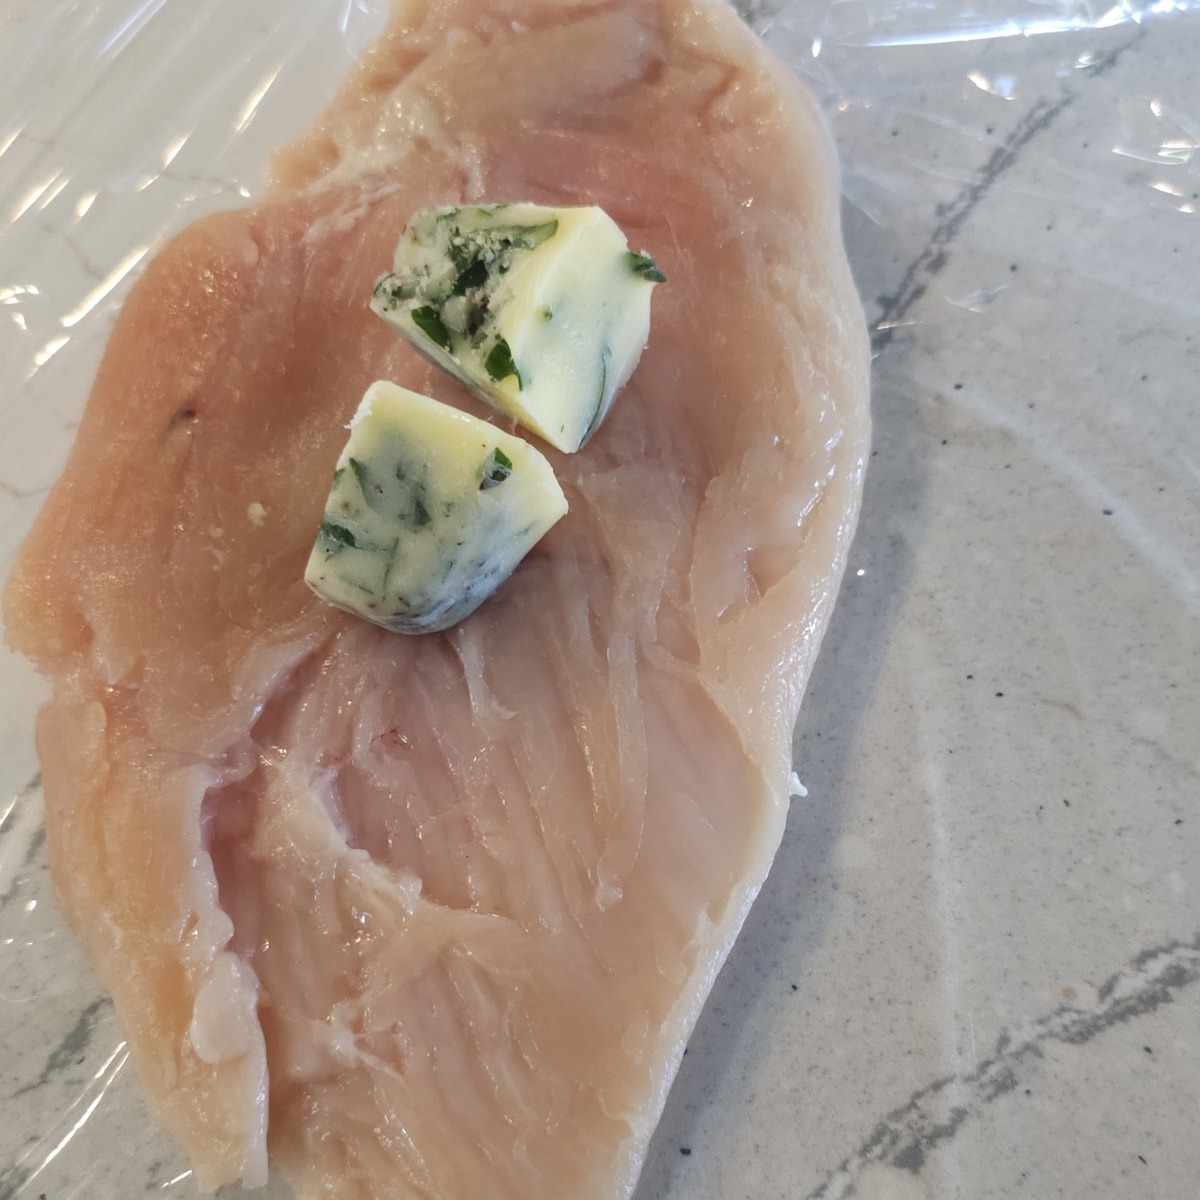
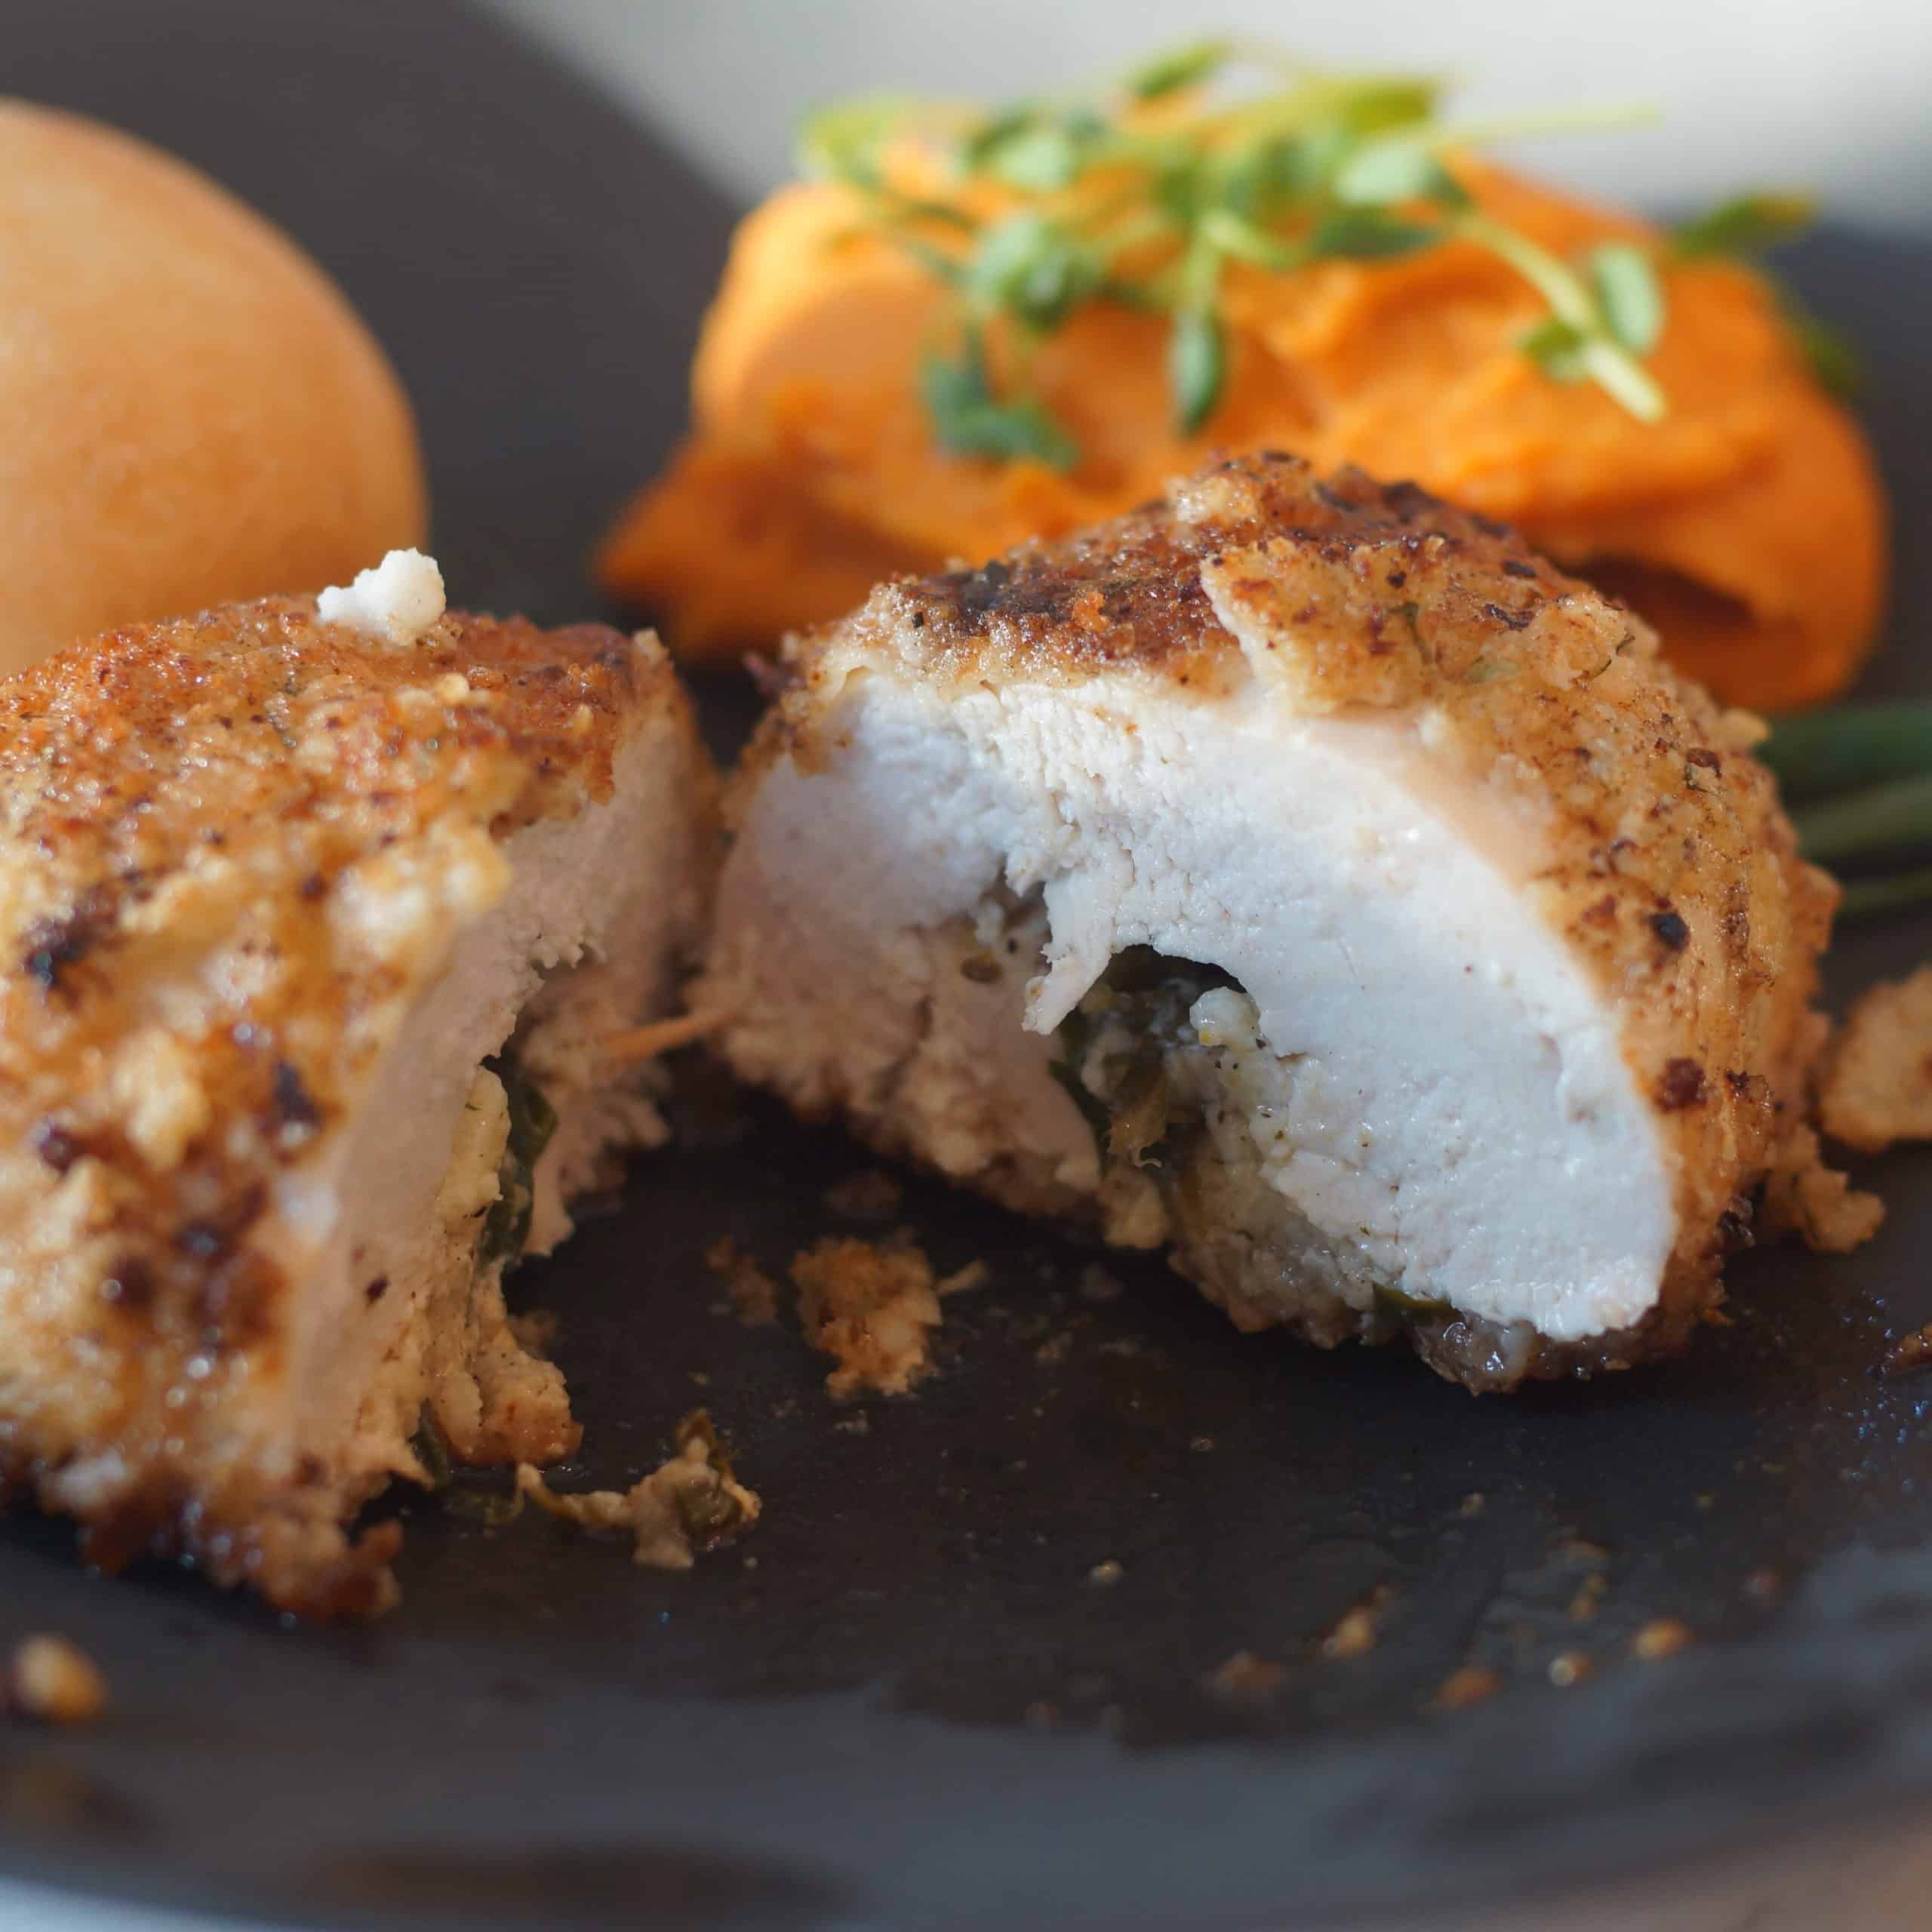
Remove the herbed butter cubes from the freezer and take them out of the ice tray. Place a cube in the center of each chicken breast. You want the herb butter to be cold, so do not let it sit too long at room temperature. Halve the pieces, if needed, to help the butter fit in the chicken.
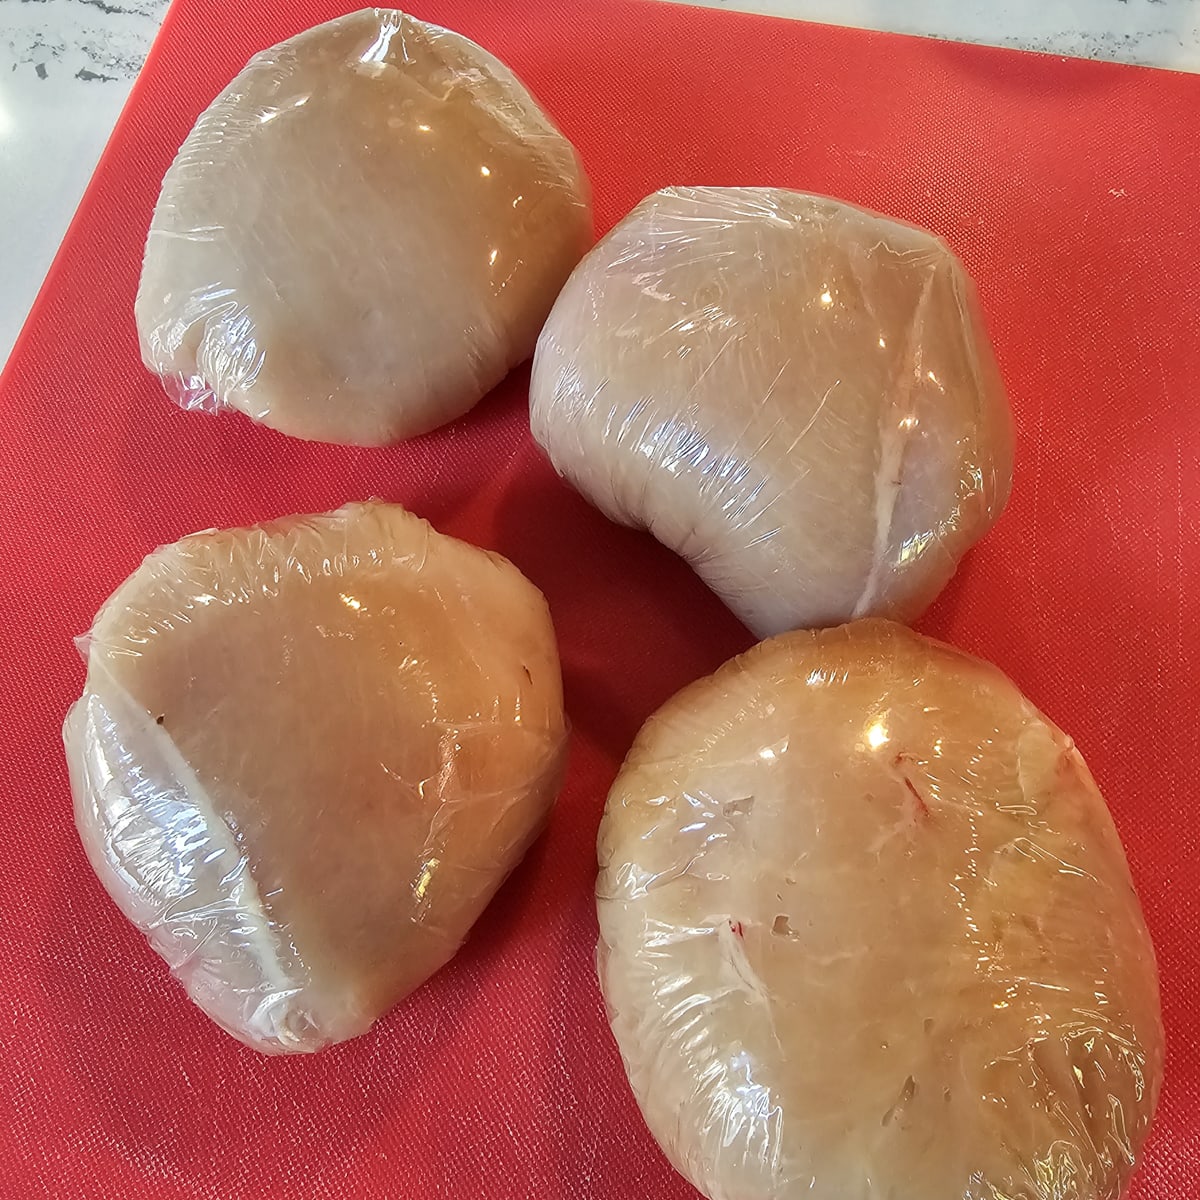
Fold the chicken around the herbed butter. We have found it helpful to use a piece of plastic wrap to help form the chicken. Depending on the size of the chicken breasts, you may also find it helpful to use a toothpick to hold the chicken together.
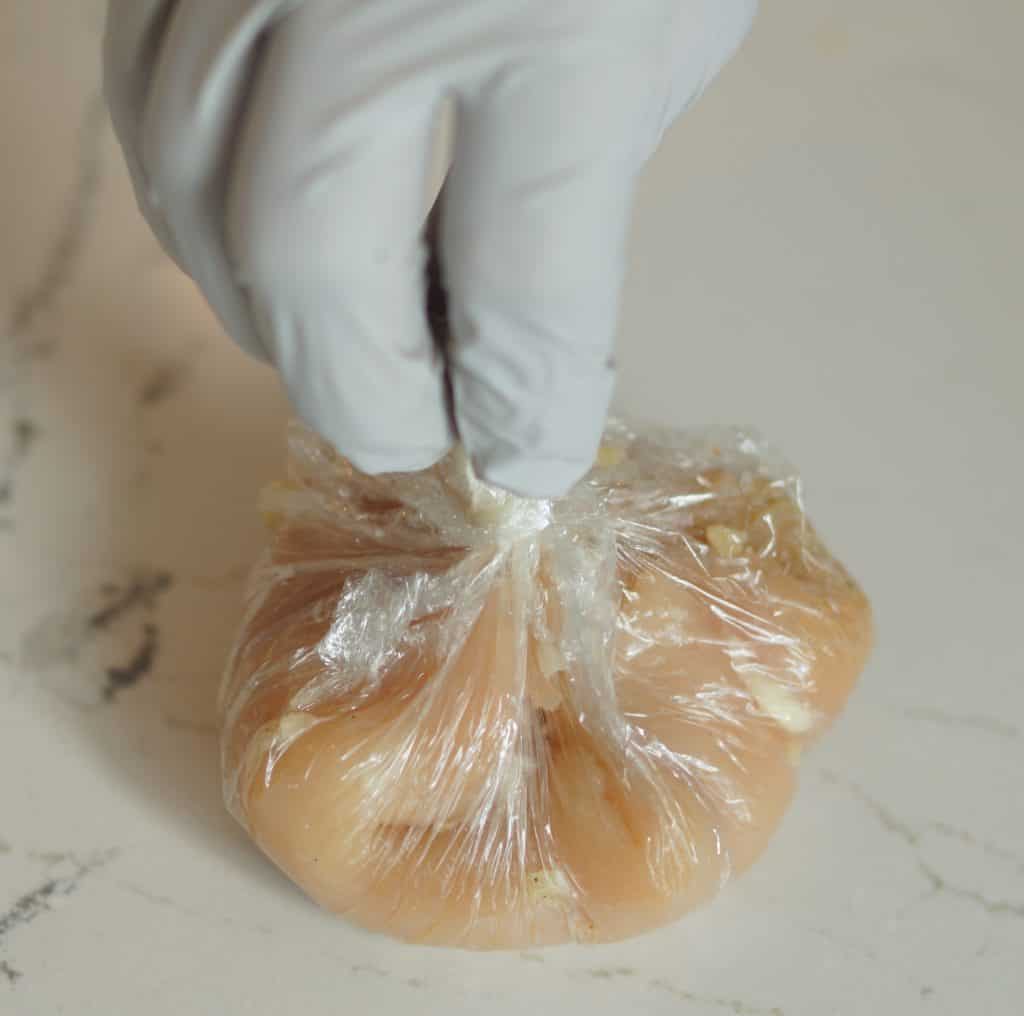
Place the butter stuffed chicken breasts in the refrigerator for about 30 minutes before breading.
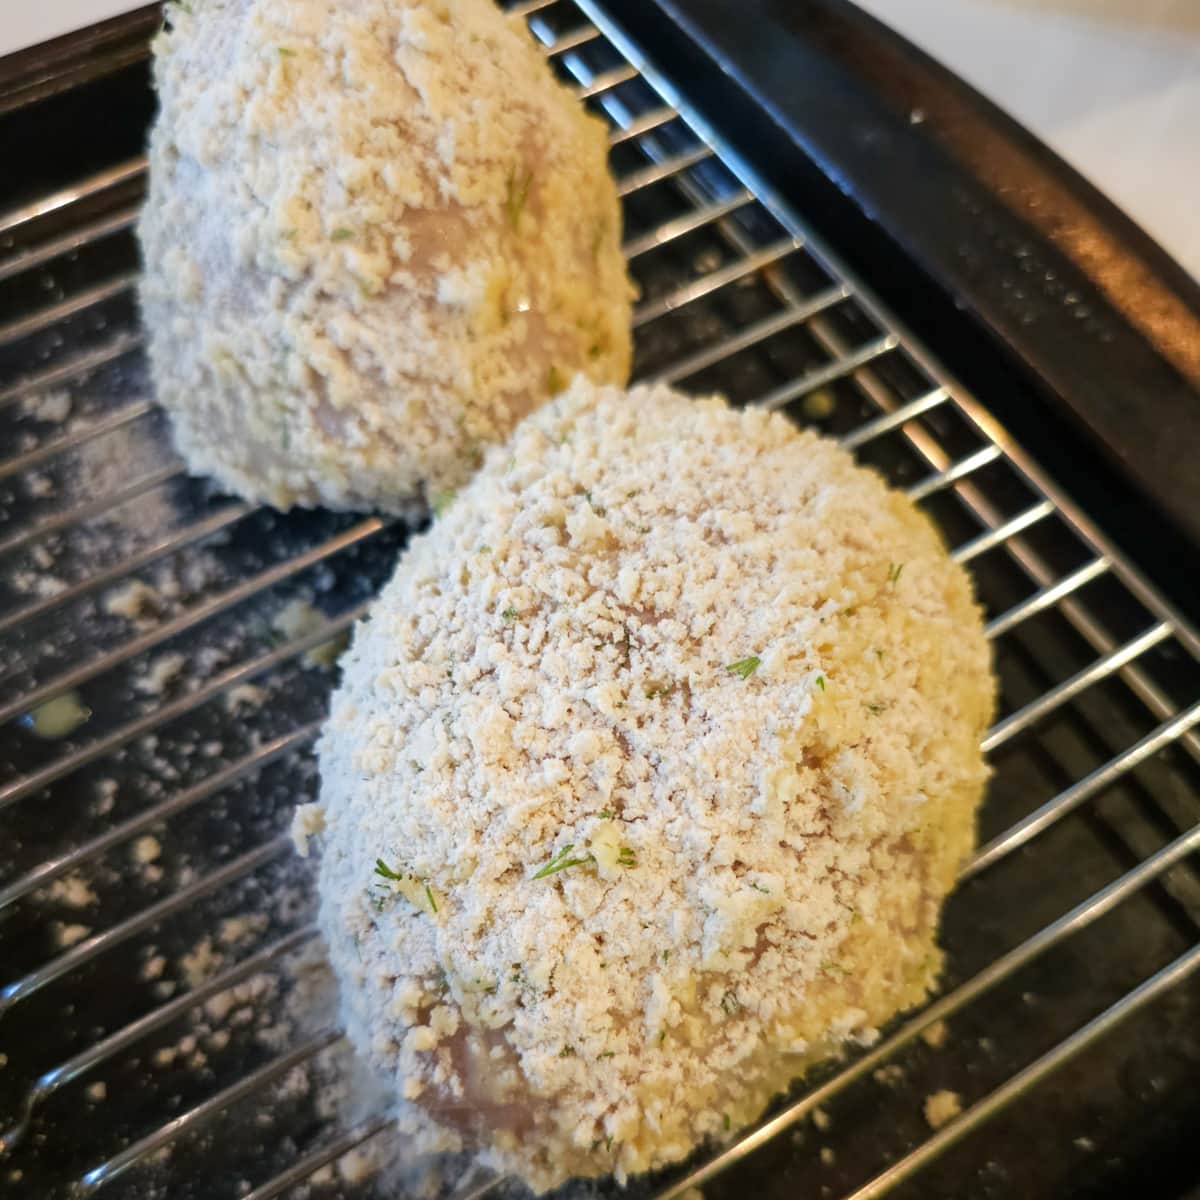
To bread the Chicken Kiev, dip the chicken into the egg mixture. Allow the excess egg to drip off, then coat all sides of the chicken with the seasoned breadcrumb mixture.
Repeat with the remaining chicken, then place the chicken on a wire rack for about 15 minutes while to heat your oil and butter.
Cooking the Chicken Kiev
Chicken Kiev can be cooked on a large skillet or cast iron pan on your stovetop, or you can try our smoked Chicken Kiev recipe.
Making Traditional Chicken Kiev
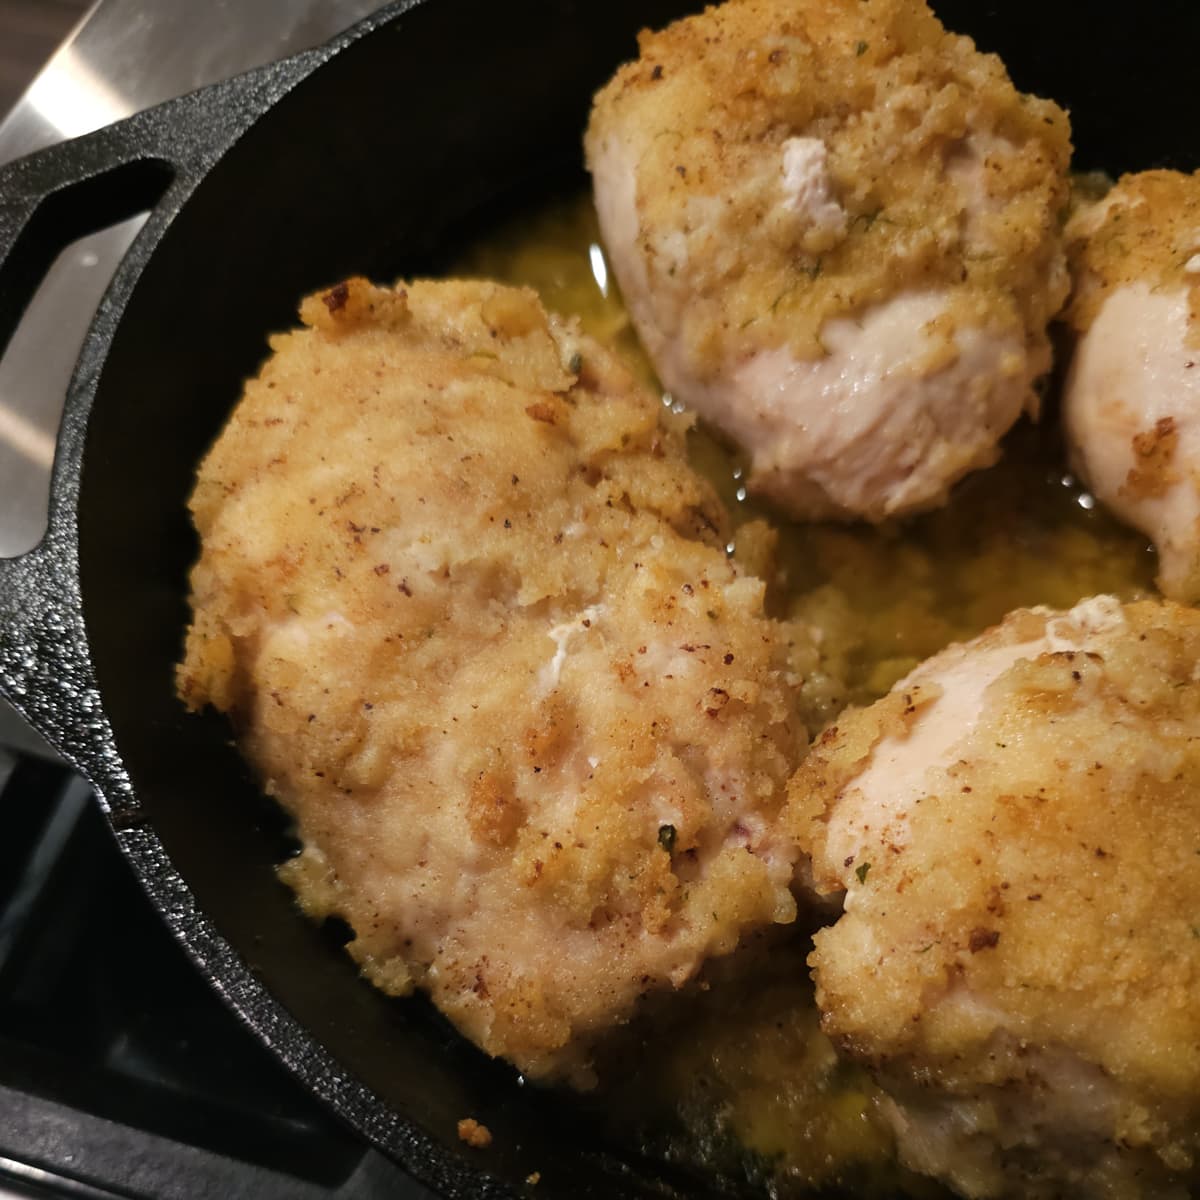
Over medium heat, melt 2 tablespoons of butter in a skillet or heavy bottomed pan, then add 2 tablespoons of oil. You want to cook over medium heat, or about 350 degrees. When the butter is beginning to foam add the chicken to the pan. Cook for 3-4 minutes, then flip the chicken.
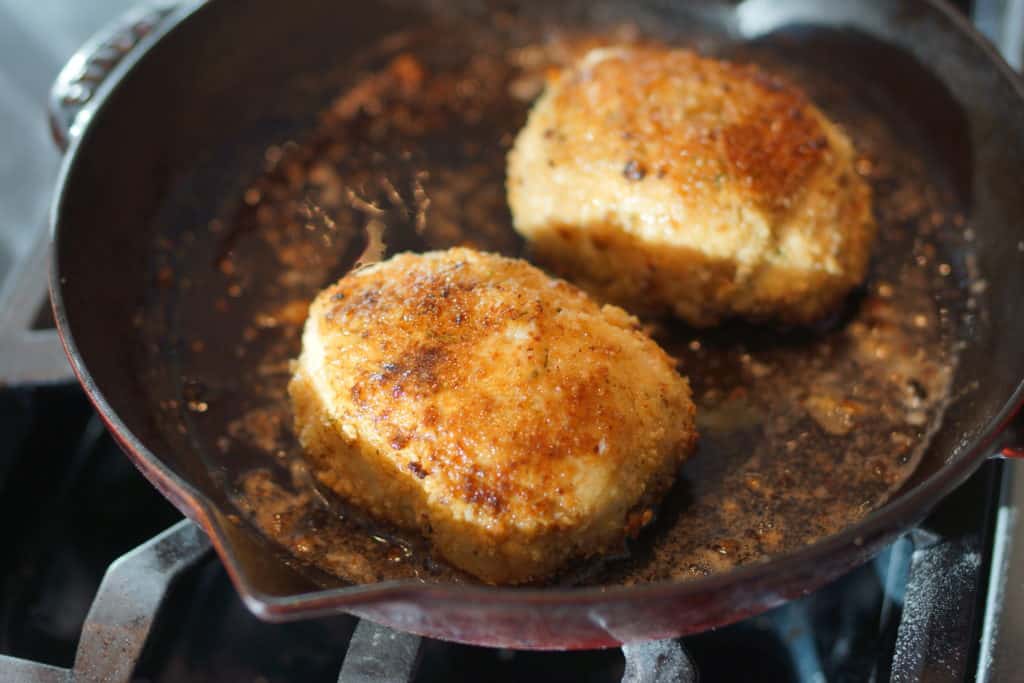
After an additional 3-4 minutes then flip the chicken again. Cook to an internal temp of 165 degrees. This will likely take about another 3-4 minutes but it is best to check with an instant read thermometer.
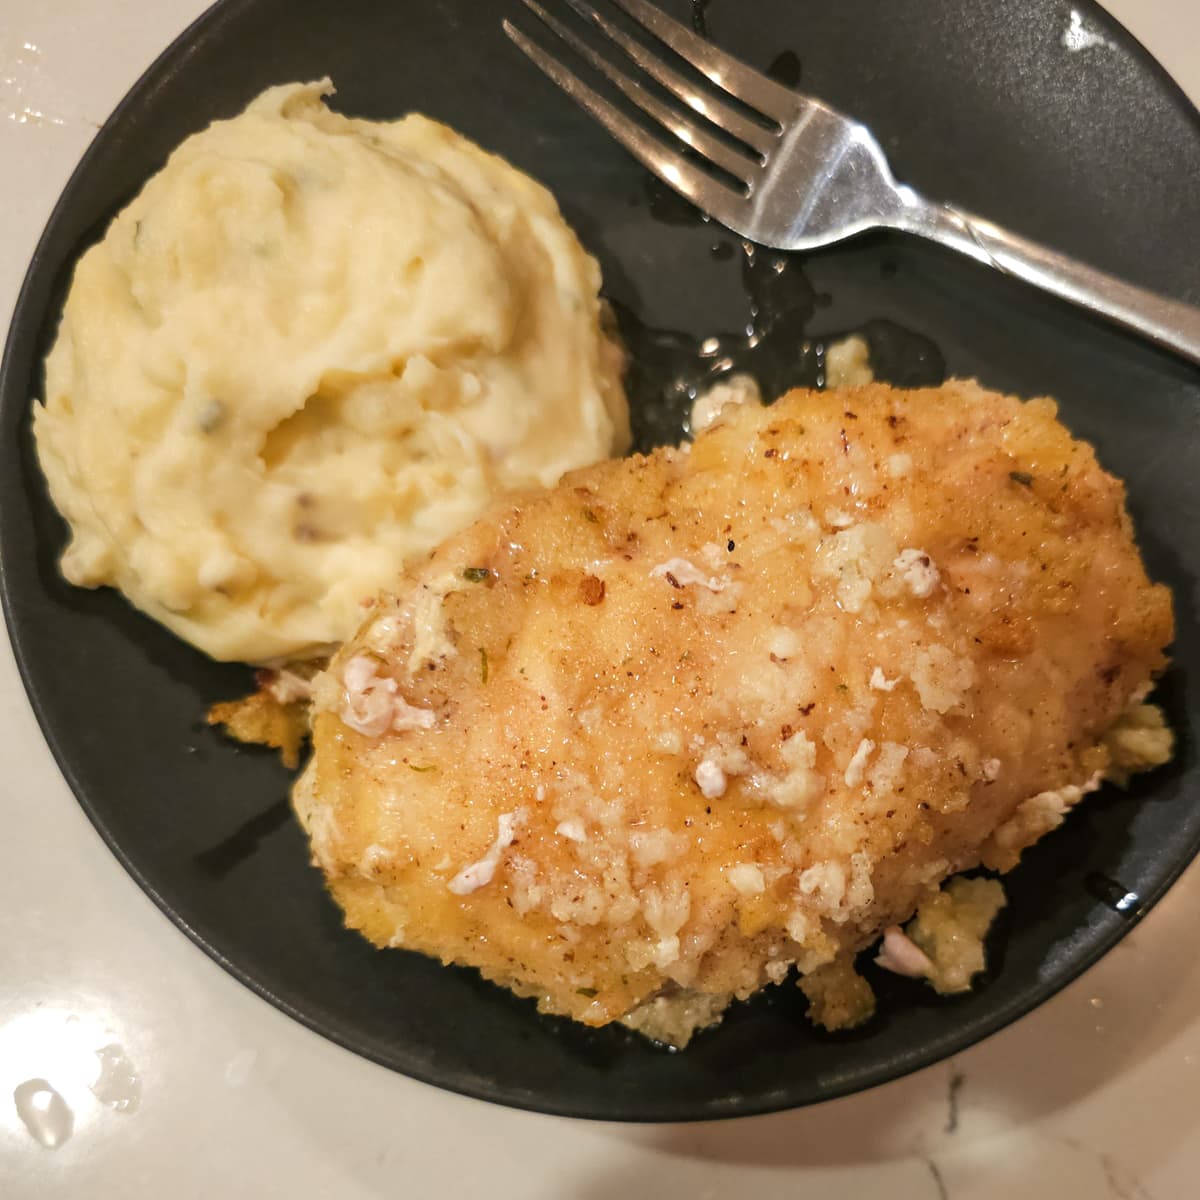
When the chicken is nicely browned and cooked through, remove the chicken to a plate and let rest a few minutes before serving.
Making Smoked Chicken Kiev
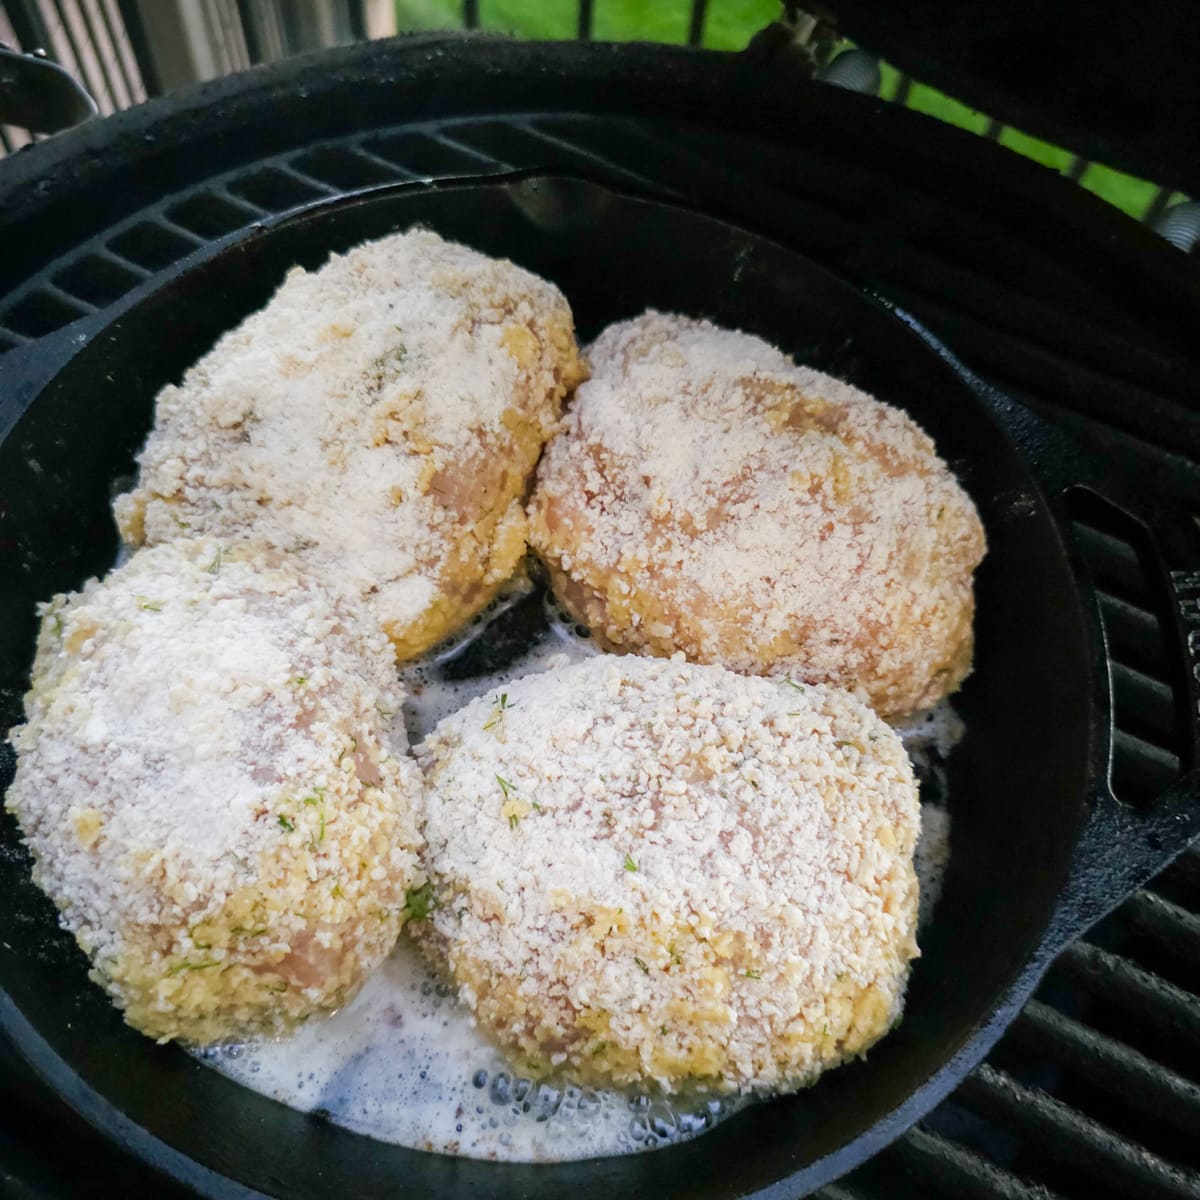
To make Chicken Kiev on a smoker or grill, set up for indirect heat. Add the oil and butter to a cast iron pan and preheat inside the smoker or grill at 400 degrees for at least 30 minutes. When cooking in a smoker, it takes the oil a lot longer to rebound the temperature once adding the chicken, so we find it best to start at a higher temperature.
We like to cook the herb butter stuffed chicken breasts with a mild wood like apple, or cherry. It is a short cook, however, so stronger flavored woods like pecan, or oak will also typically work if you want a more pronounced smoke flavor.
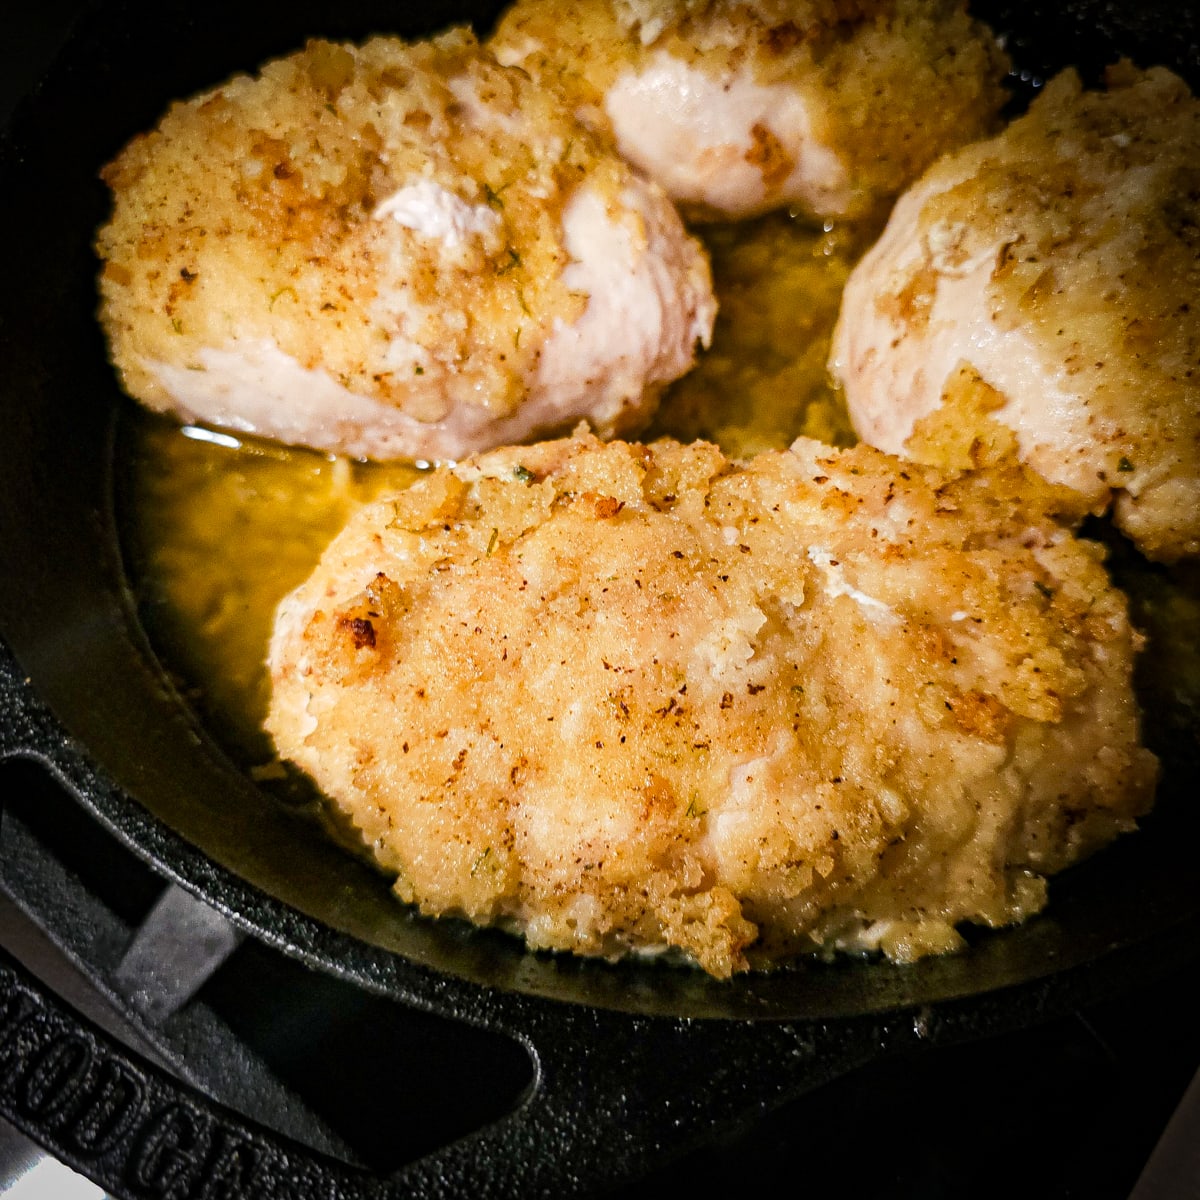
Once the butter and oil is heated add the chicken breasts and cook for about 4-5 minutes, then flip the stuffed chicken breasts over.
Cook for another 4-5 minutes then flip again. Check your temperature and continue to cook the smoked Chicken Kiev until the internal temperature reaches 165 degrees.
Once the breaded chicken breasts are fully cooked, remove to a place and let sit for about 3-5 minutes before serving.
What to Serve with Chicken Kiev
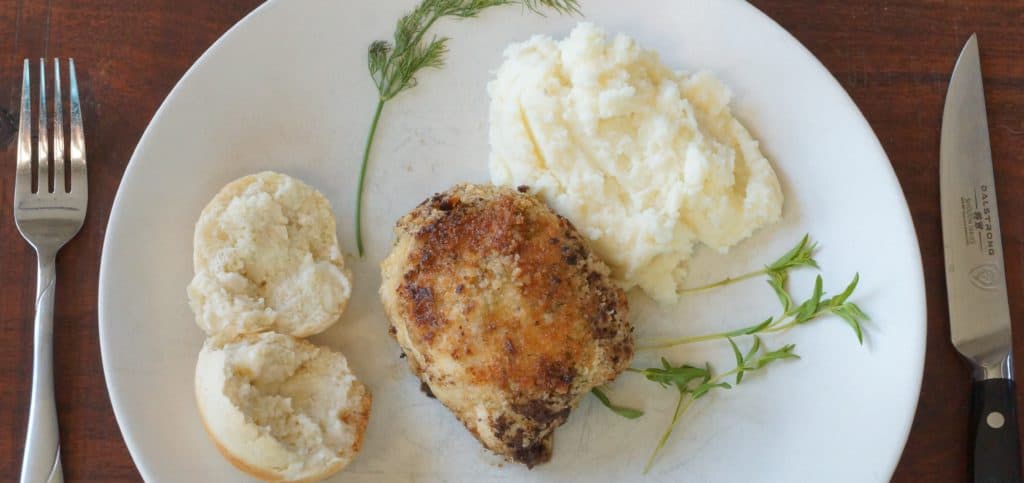
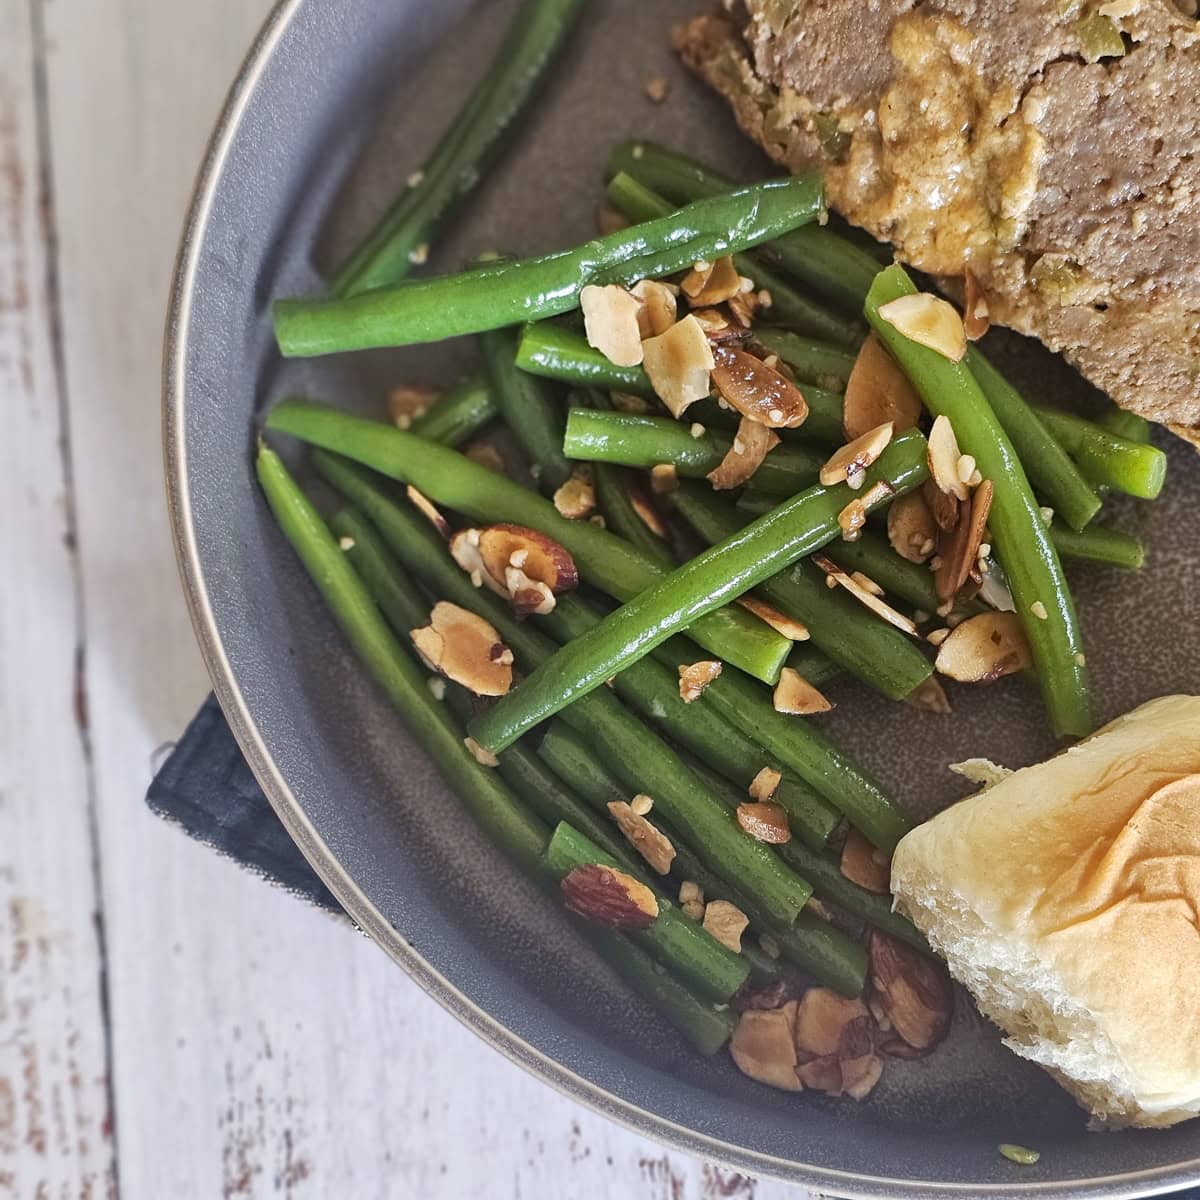
Chicken Kiev pairs well with vegetables and potatoes. Mashed potatoes are a great pairing, or try serving the butter stuffed chicken with some Smoked Au Gratin Potatoes.
Take care when eating the Chicken Kiev as the butter mixture may be quite hot. Fun fact, some restaurants used to have a warning label for this dish to be careful not to burn yourself with the hot butter or cut it open to vigorously and spray yourself with the melted butter.
If you are looking for more great chicken recipes be sure to check out some of our favorites:
- Taiwanese Night Market Spicy Fried Chicken
- Nashville Hot Chicken Sandwich
- Grilled Souvlaki (Greek Chicken Skewers)
- Italian Style Parmesan Wings
- Pollo Asado al Carbon: Mexican Grilled Chicken
- Peruvian Anticuchos de Pollo: Peruvian Chicken Skewers
- Smoked Lebanese Chicken Shawarma
Frequently Asked Questions
Chicken Kiev is stuffed with a flavorful herb butter, then breaded and fried.
Chicken Kiev should be cooked to an internal temperature of 165 degrees.
Leftovers are best reheated in an oven at 350 degrees until the temperature of the chicken has reached 165 degrees.
Thank you so much for visiting our blog. If you tried and enjoyed our recipe please share with others and please leave us a comment and review. We also love to see your pics so don't forget to tag us @Carne_Diem_Culinary or #CarneDiemBlog. To be notified of future recipes please follow us on Facebook, Instagram, or Pinterest, or sign up for our e-mail notifications. Until next time, Carne Diem!
📖 Recipe

Chicken Kiev with Fresh Herb Butter
Equipment
- Skillet
Ingredients
- 8 Chicken Breasts
Fresh Herb Butter
- 12 Tablespoons Butter salted
- ½ teaspoon Black Pepper
- 1 Tablespoon Minced Garlic
- ¼ Cup Fresh Parsley finely chopped
- 1 teaspoon Fresh Tarragon finely chopped
- 1 teaspoon Fresh Thyme
Seasoned Breading
- 1 cup Panko Bread Crumbs
- ½ cup Flour
- 2 teaspoons Ranch Seasoning
- 2 teaspoons Fresh Dill finely chopped
- 1 teaspoon Garlic powder
Egg Mixture
- 5 Eggs
- ½ Cup Buttermilk
For Frying
- ¼ Cup Butter
- ¼ cup Olive Oil
Instructions
Prepare the herbed butter
- Finely chop the parsley, thyme and tarragon and place in a small bowl. Melt the butter and add to the bowl with the chopped herbs. Add the pepper and minced garlic and stir well to combine.
- Pour the melted butter mixture into an ice cube tray and place in the freezer for at least 2 hours to solidify the butter.
Make the Breading
- Combine the panko, flour, garlic powder, ranch seasoning and dill in a small bowl and mix to combine. Set aside.
Making the Chicken Kiev
- Lay out the chicken breasts and tenderize them with a Jaccard, or place between 2 pieces of parchment paper and pound them with a meat mallet until they are about ¼ inch thick.
- Beat the eggs with the buttermilk in a small bowl. If you do not have buttermilk, you can substitute regular milk.
- Remove the butter from the freezer and place a cube in the center of each chicken breast. You can halve the cubes if it helps them to fit better. Wrap the chicken breast around the cube and seal as best as possible. If necessary use a toothpick to hold the chicken together. Place the chicken in the refrigerator for 30 minutes.
- Next, dip the chicken into the egg mixture. Allow the excess egg to drip off, then coat all sides of the chicken with the seasoned breadcrumb mixture. Repeat with the remaining chicken. Allow the chicken to sit on a wire rack while you prepare the oil for frying.
- Melt the 2 tablespoon of butter along with the 2 tablespoons of olive oil in a skillet over medium heat. When the butter is just starting to foam, add the chicken.
- Cook the chicken for 3-4 minutes, then flip and cook 3-4 more minutes. Flip one last time and cook to an internal temp of 165 degrees (typically another 3-4 minutes).
- When the chicken is fully cooked remove it from the pan and let it rest a couple minutes before serving. Caution the butter in the center may be extremely hot.
- You may need to add additional oil and butter to the pan in order to finish frying all of the chicken.

Comments
No Comments